Let’s Put a Pin In It
Now that I have a veil, I need something to, you know, keep it on my head.
My favorite thing about drop veils is how ethereal and effortless they are. The best ones seem to stay in place via magic. It’s becoming more common to see combs sewn to drop veils, but I feel like that can take away some of the lightness, as well as restrict your placement options.
I decided to go with the more traditional method of attaching the veil, which is with a hat pin. I wanted something easy, pretty, unobtrusive, and easy. Did I say easy? The pins will really only be visible for the handful of minutes I’m wearing the veil as a blusher, so I didn’t want to spend too much time or money on this project.
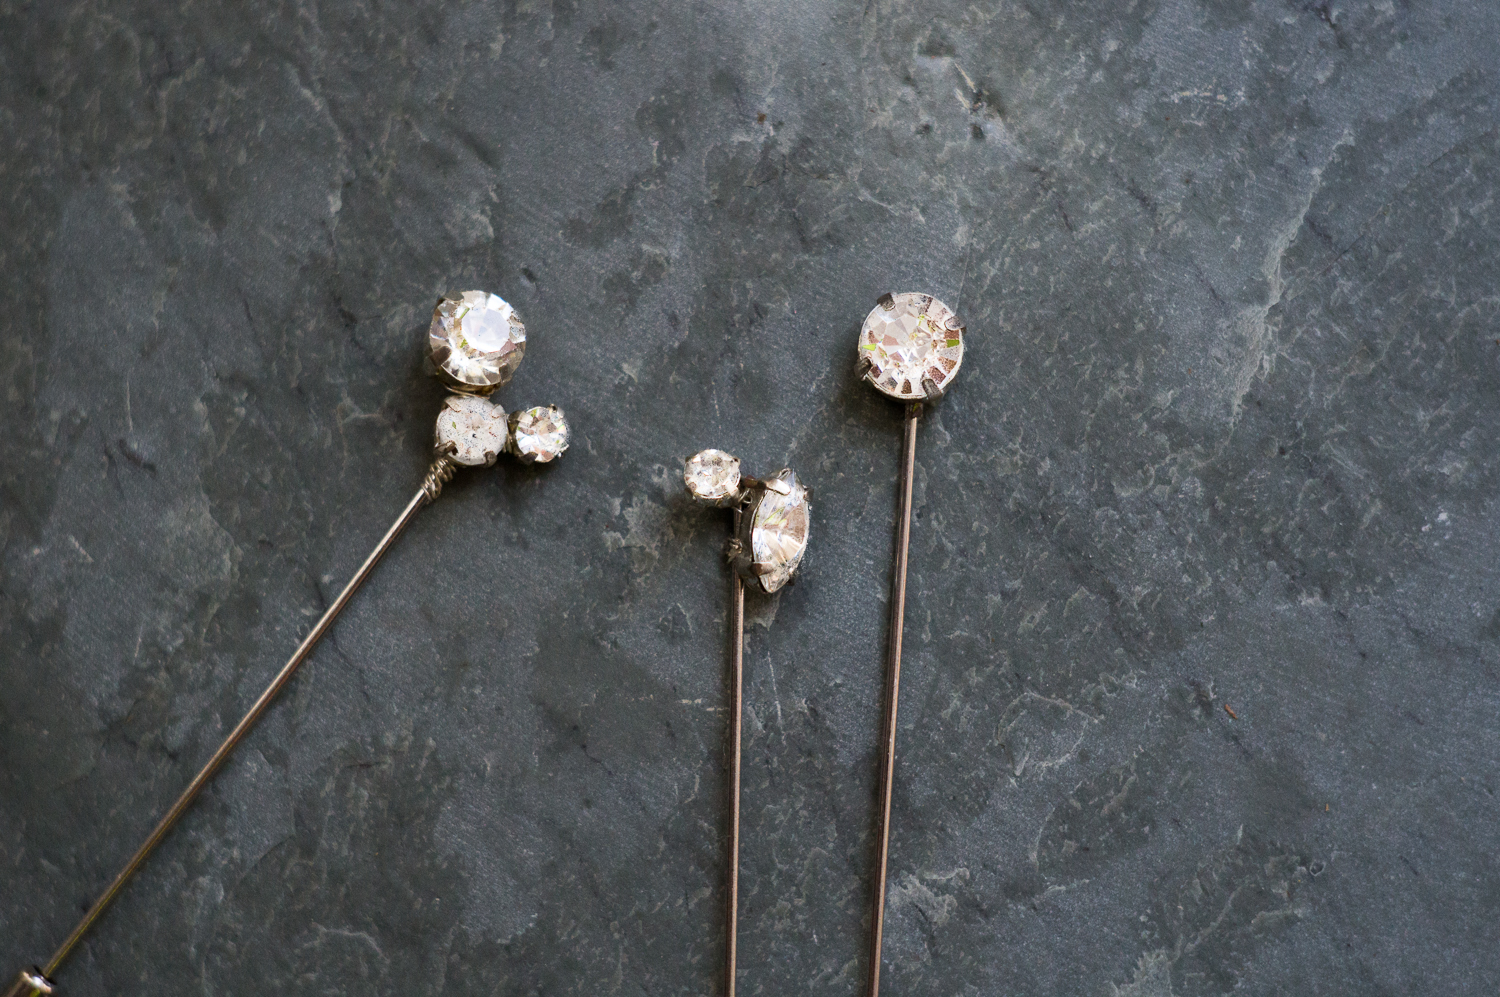
I found these stick pins on Amazon. With 30 pieces for $11, I figured I couldn’t go wrong. I particularly liked the little cap for the sharp end of the stick. Very helpful to avoid accidental stabbings on the wedding day. The weird “shower head” mount seemed like it could either be useful for attaching embellishment or a nuisance that I could just snip off. For my purpose, it ended up being the latter, but I think it would be great for attaching larger, soft embellishments, like silk flowers. I think these pins are actually meant for boutonnieres, which makes a lot of sense.
For this project, I used crystals in sew-on settings (I used leftovers from my dress, but you can find these online in a variety of colors, shapes and sizes by searching for “chaton montees” or “chatons in sew-on settings”) and 30 gauge silver wire. I used a bit of E6000 glue on a couple of the pins (more on that in a bit) and kept my wire cutters and needle-nose pliers close-by. I made a mixture of single-stone pins and cluster pins so that I can have options on the day. I’ll likely use 2-3 pins, but I have about 7 on deck, ready for duty.
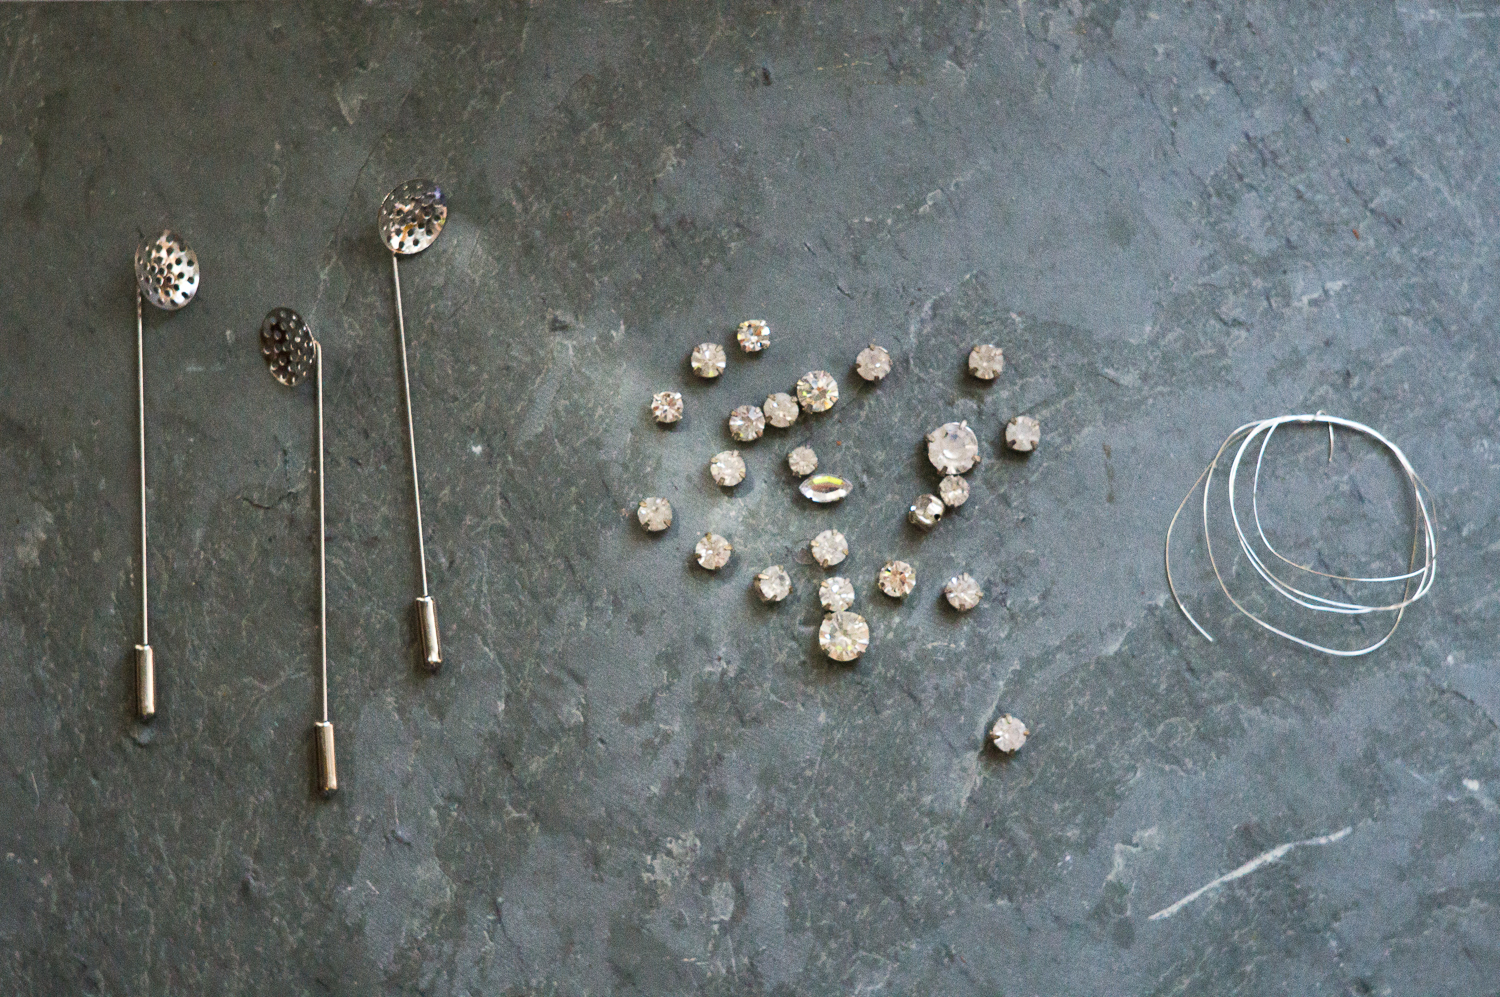
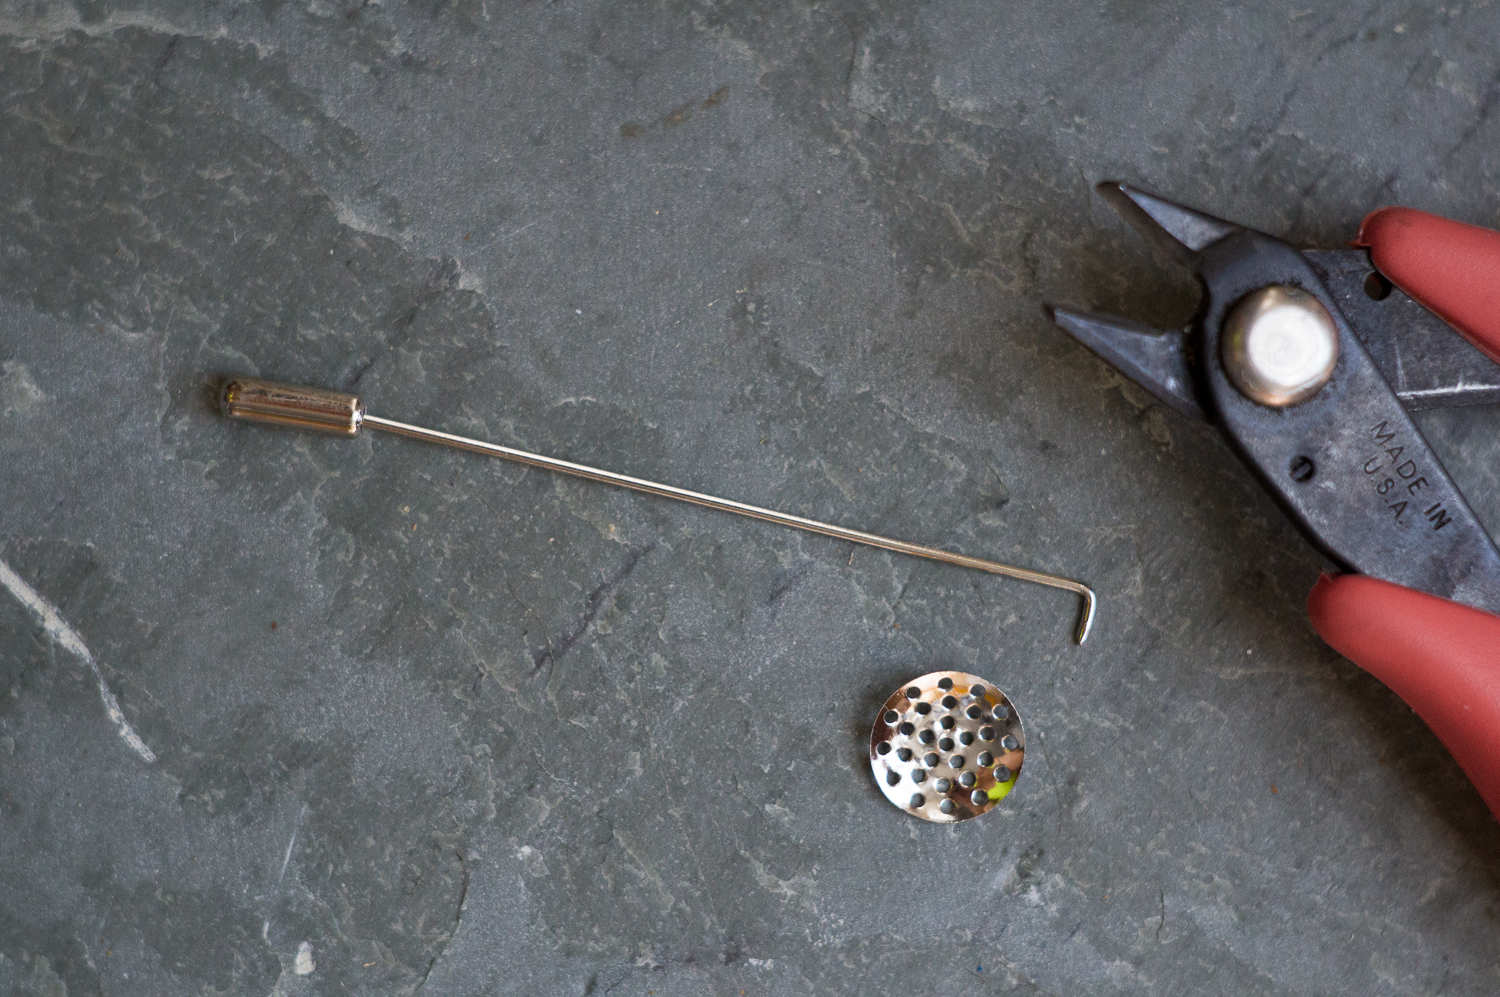 I started by chopping the “shower head” off the pins. The little L-shaped end was very useful for my single-stone pins- all I had to do was stick it through the holes on the back of the stone, bend it into a loop, then pinch it flat with my pliers. Basta. No wire necessary. I added a dab of E6000 on the back of the single stone ones just to prevent the stone from jangling around at all.
The cluster pins were a LITTLE more complicated, but still very quick and easy. I found it easiest to construct the stone cluster first, and then wire the whole thing to the stick pin. I did a couple where I added stones on after the first stone was already attached to the stick pin, and it was a real pain.
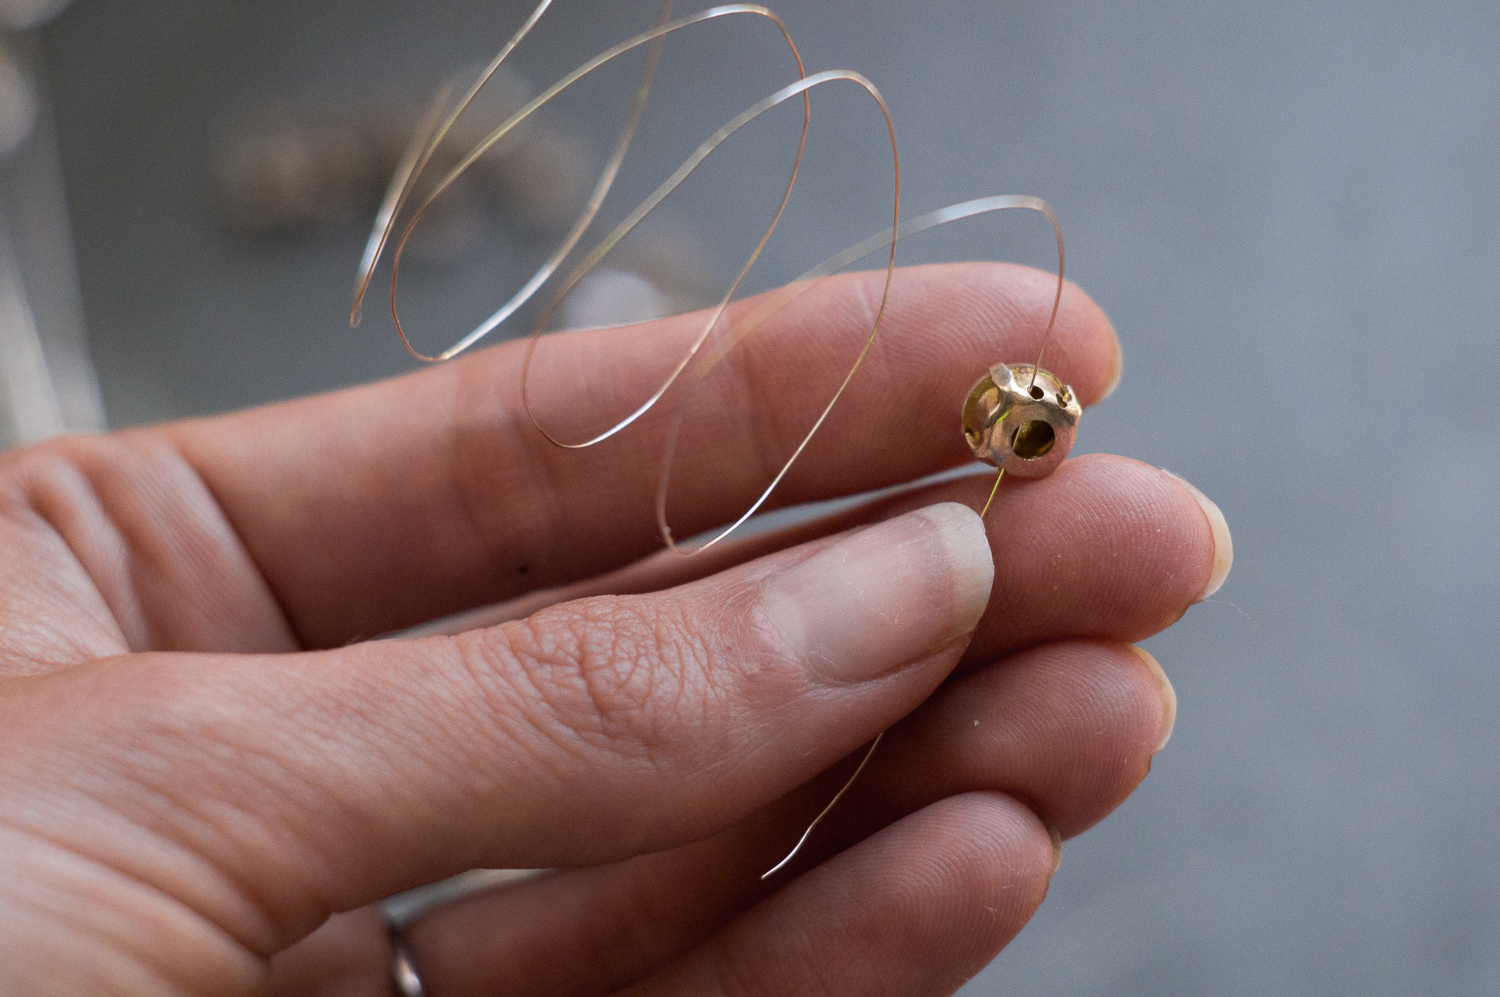 Some sew-on settings will have two sets of parallel holes like this- other stones (usually smaller ones) will have one hole on each face. It doesn’t matter which type you end up with.
 I wanted my little stone to be coming off on a slight angle from the larger stone, so I wired two adjacent holes rather than sending the wire straight through. The whole thing is pretty loose and wobbly at this point, so you want to continue to loop the wire through the holes 3 or 4 more times. You want it to be sturdy, but not too bulky.
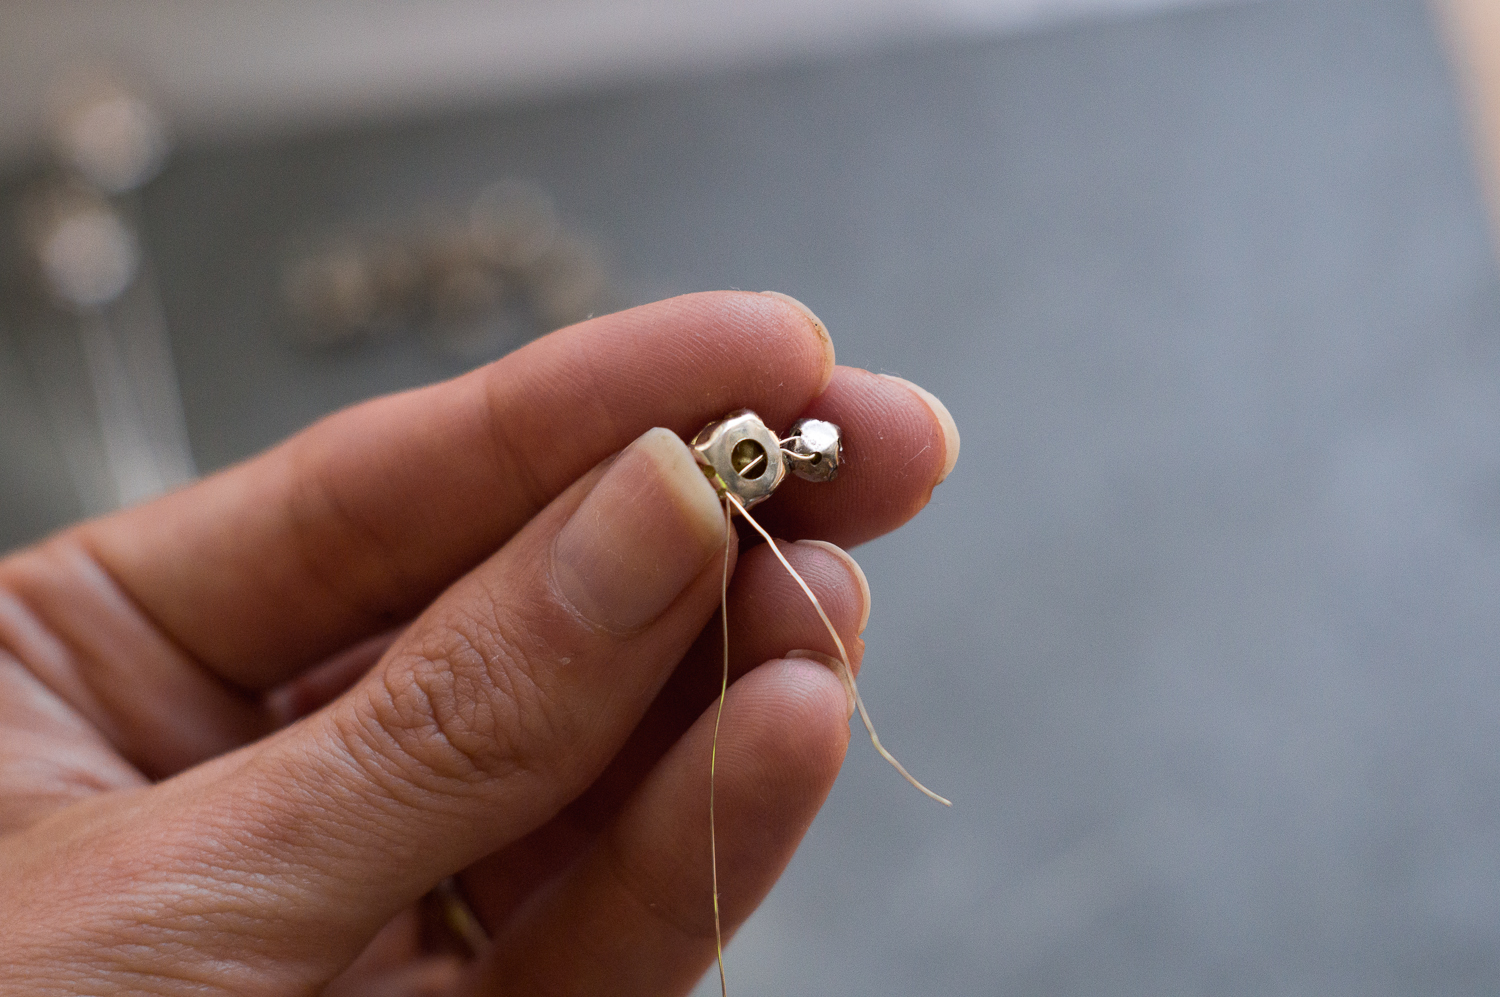
 I then like to wrap the wire between the stones a couple times, just to give them a little air to breathe. The slight separation between the stones makes the piece look much more delicate.
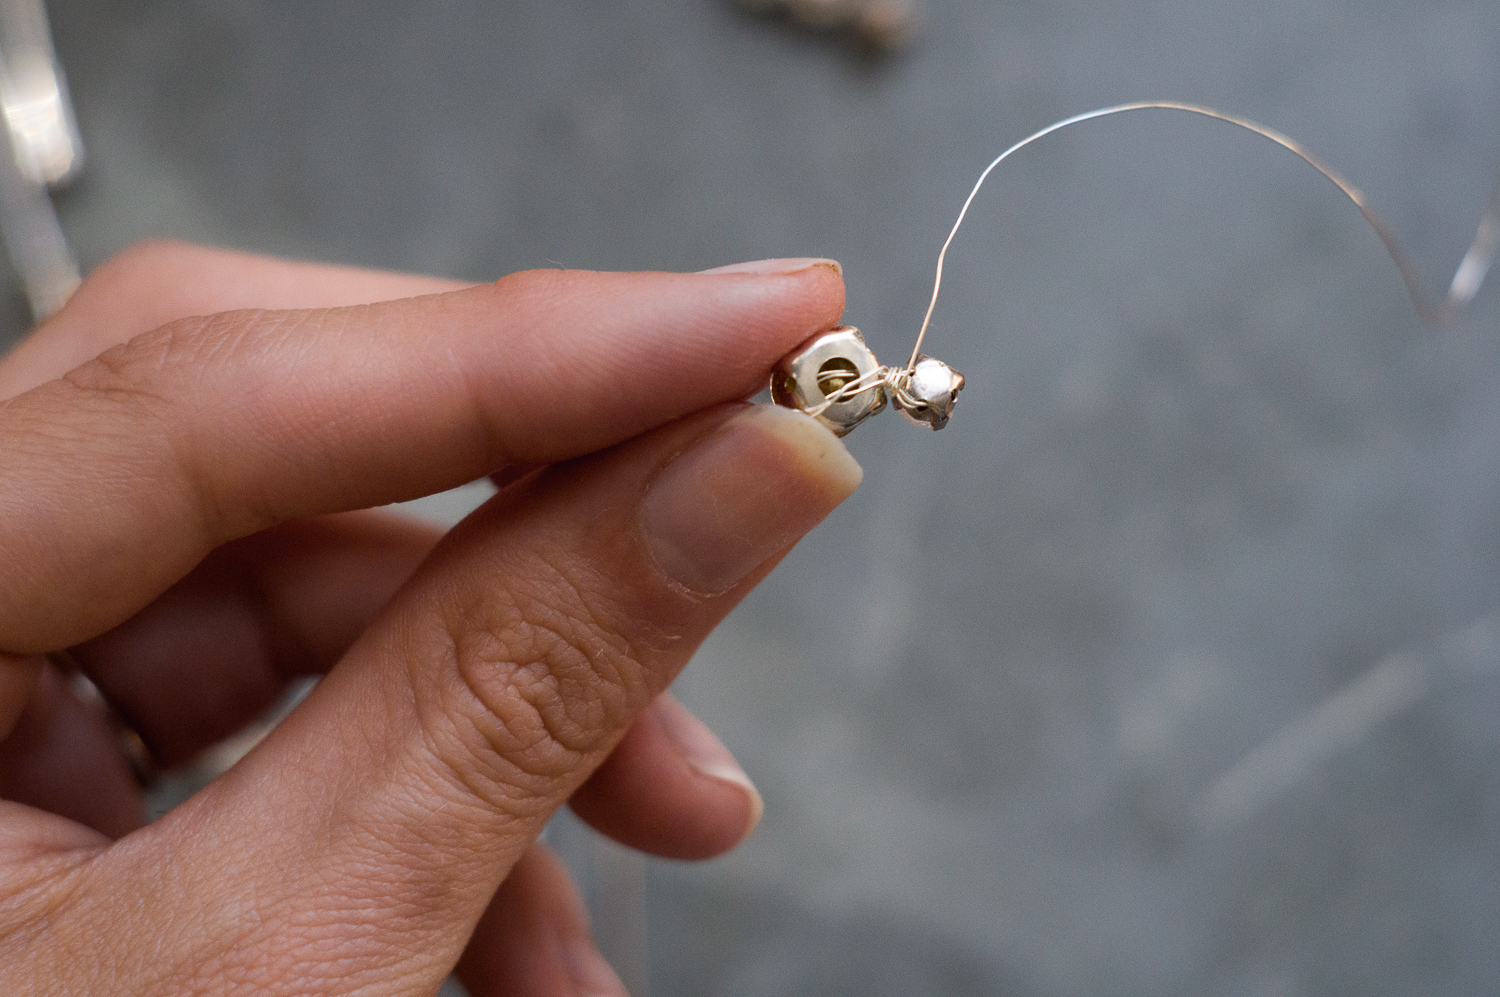
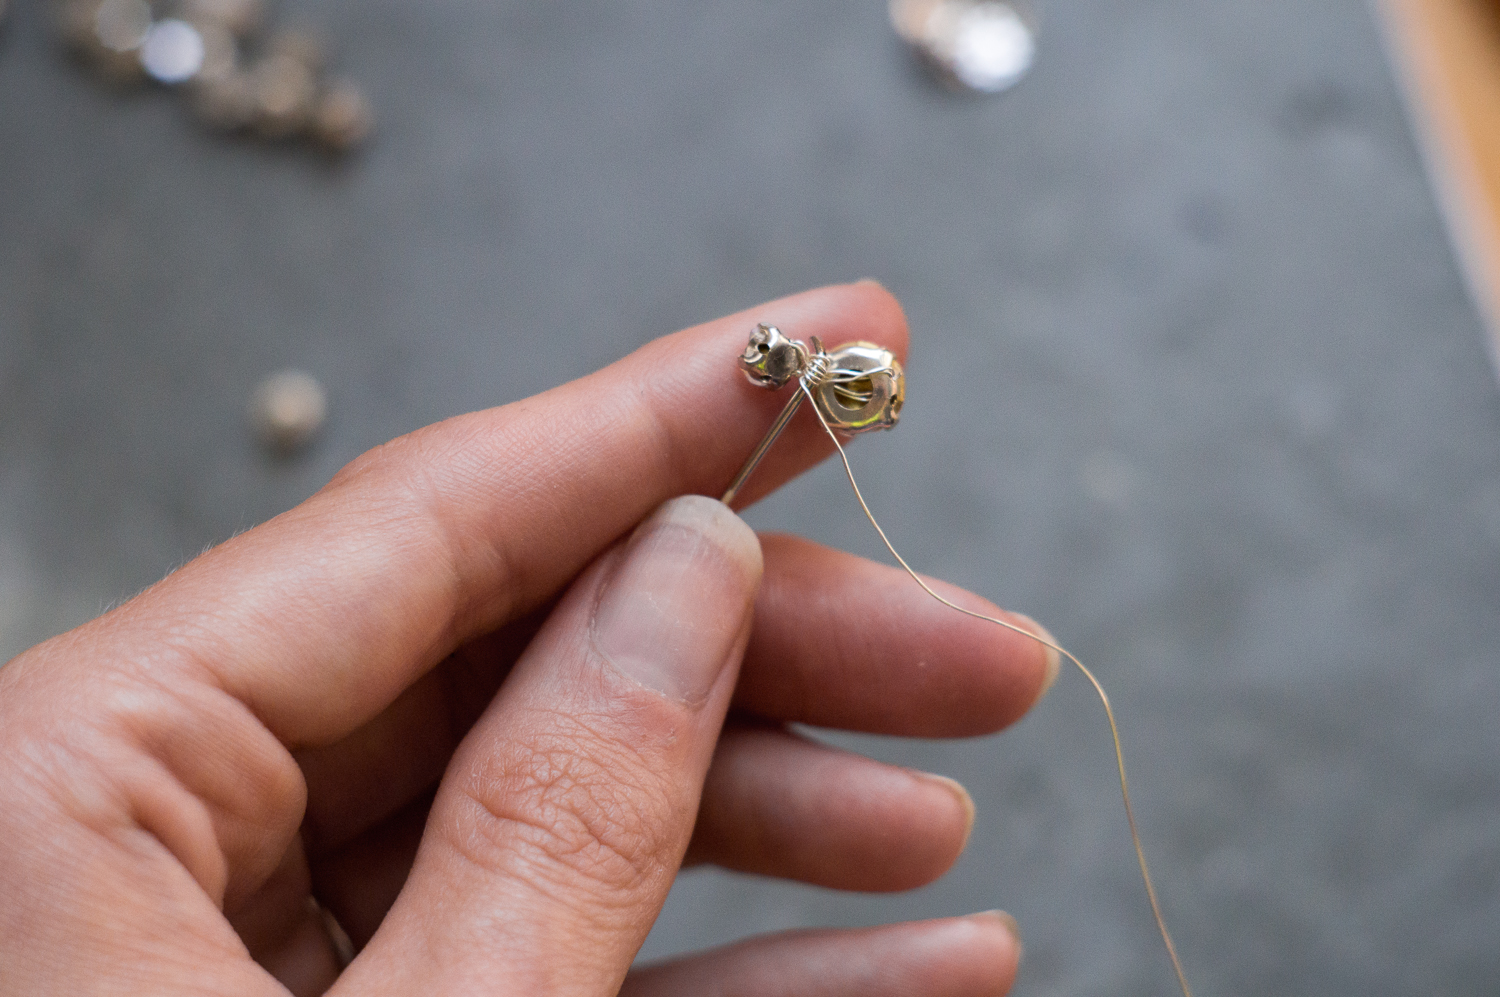 Then, you just wrap the whole shebang onto the pin. That little hook from where we cut the shower head makes a convenient spot to nestle your stones into, and a sturdy place to start wiring. Wrap the wire tight enough that the whole thing isn’t sliding up and down the pin.
 Even though your stones should be staying in place, use the needle-noise pliers to give the wiring a little squeeze. You might also want to dab a bit of E6000 on the back at this point- I did it on some, and left others with wiring only.
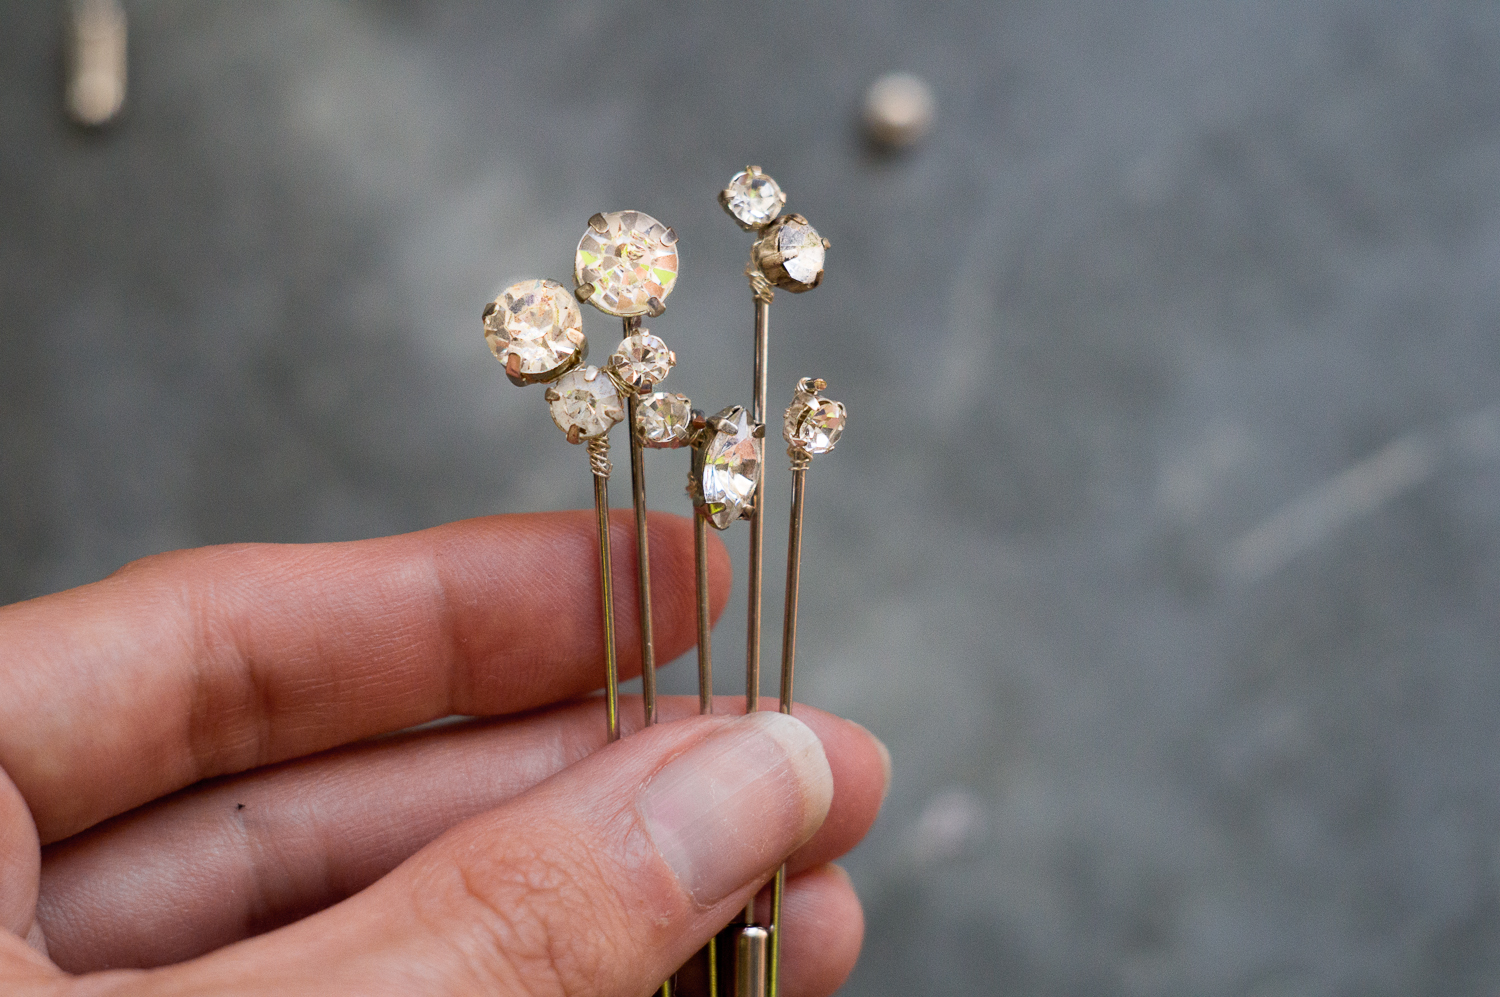 And that’s it! I made all the pins in the space of an hour. I’ll let you know how it goes.