Coptic-ing a Feel: Bookbinding DIY
Sorry, that title was really a stretch. It was barely even a pun.
But lately I’ve been playing a little bit with bookbinding. I always carry little notebooks and have a lady b***r for paper, so it’s a natural progression.
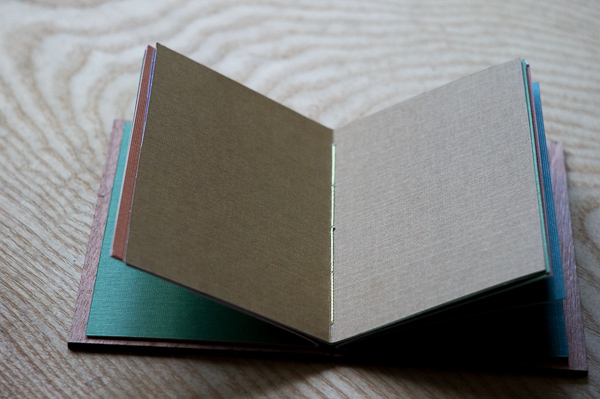
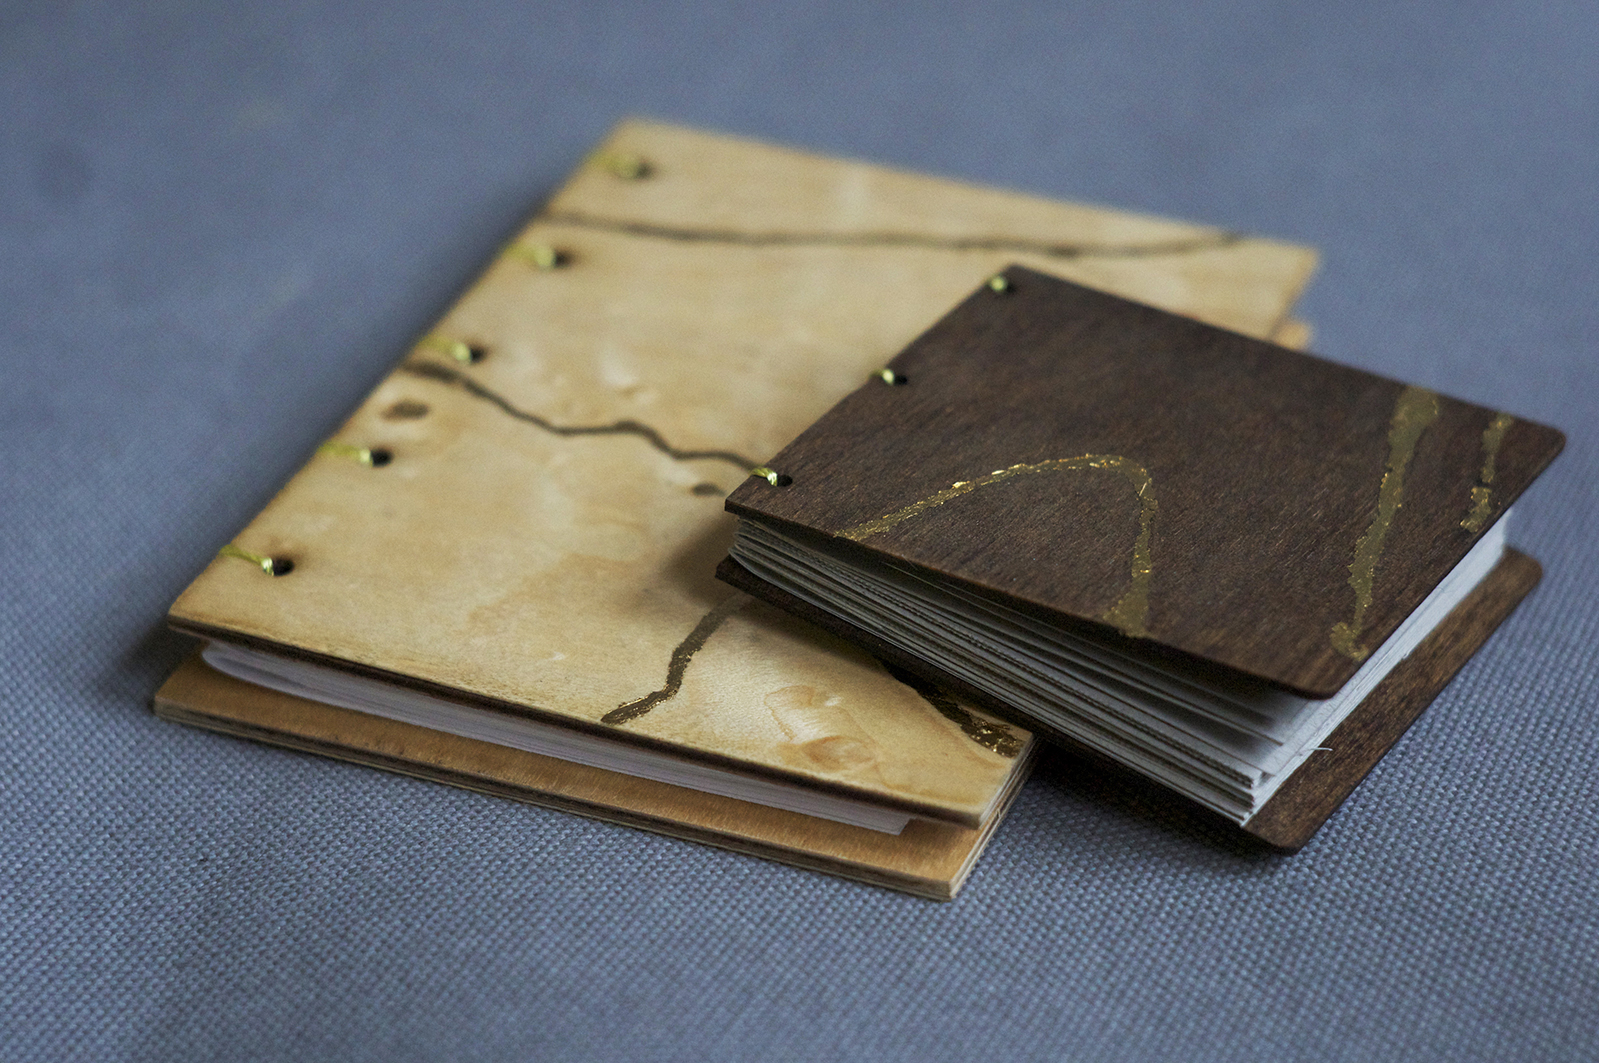
Coptic bookbinding dates back to as early as the 2nd century and was used by the Copts, early Christians living in Egypt. So it’s doable, basically, if those dummies managed it with their papyrus and thread made from goat intestines. That’s probably not accurate. But essentially, it’s just a chain stitch running along the signatures (the folded pieces of paper in a book). I like it because if you are using a book board that doesn’t need covering- perhaps a laser cut piece of wood- there’s no glue involved, meaning I can do this in my bed with minimal chance of mess (a good metric to follow in life).
Coptic bound books lay flat when you open them, which makes them ideal for sketchbooks. I feel like these would make great wedding favors, right? I’m not totally sold on it yet, but figured I’d share the how-to so when I’m overwhelmed and pleading for assistance, you, dear reader, won’t have an excuse to not help me.
First, gather your materials:
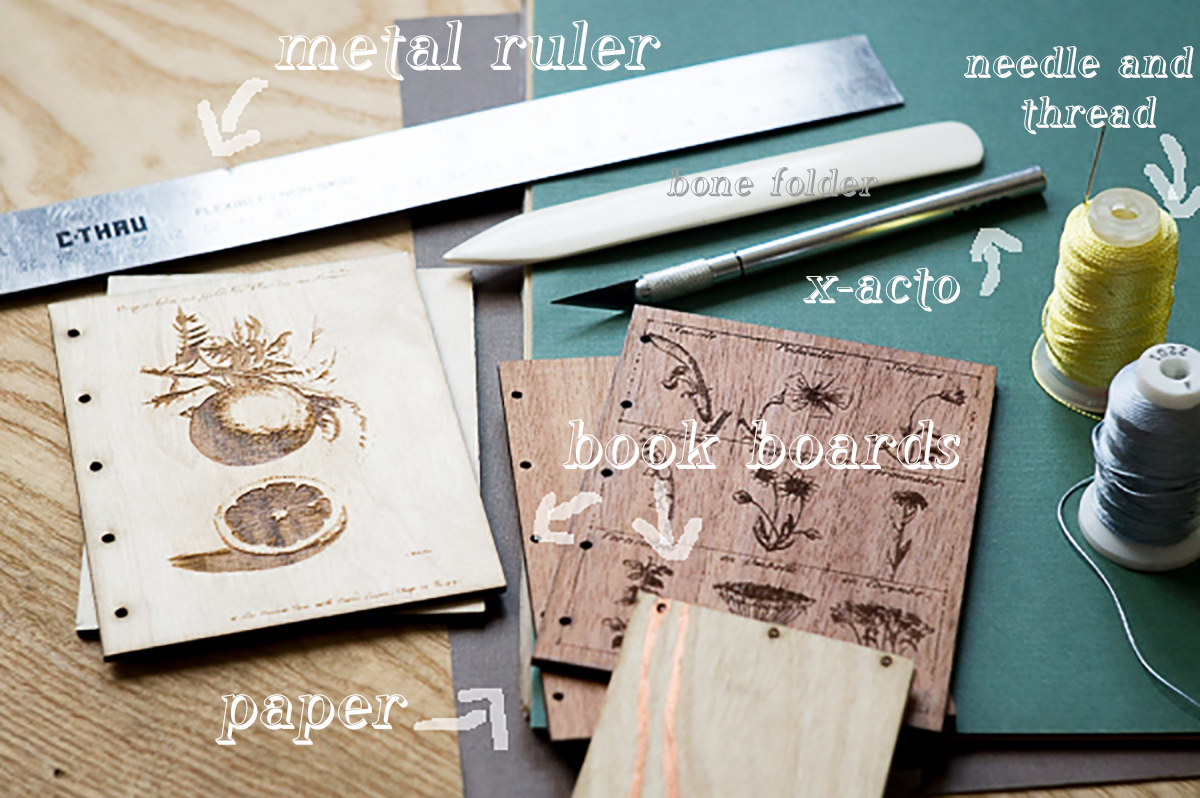
Choose a paper that is at least twice the width of your book board, since we’ll be folding it to make our signatures.
For book boards, you don’t have to use wood like I did- you can use any cardboard or super-heavy stock. If you’d like, you can cover the board with fabric to make it fancy. Just be sure to punch holes in the side so you have something to sew through.
Thread: I used topstitching thread, because I like the shine and heft. There’s specific book-binding waxed linen thread if you’re fancy, but you can use pretty much anything strong and sew-able.
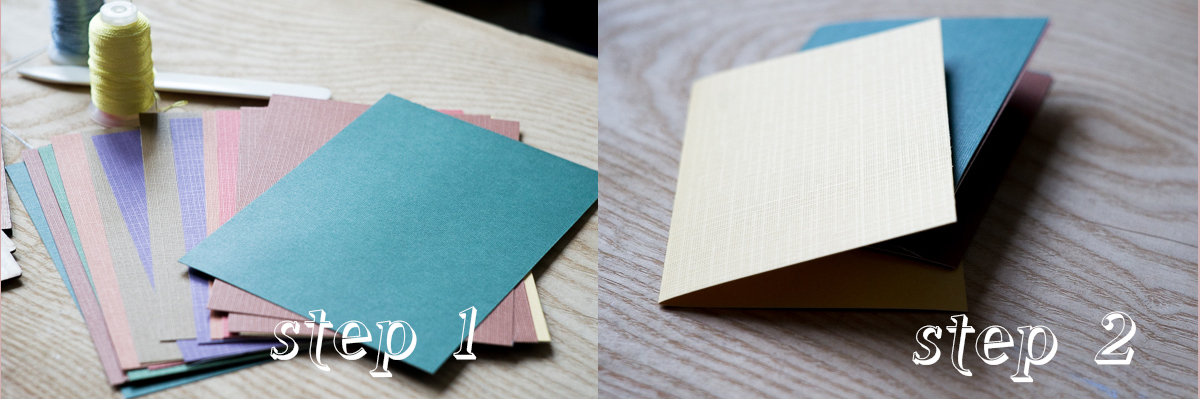
Step 1:
Cut your paper down to size- since my book boards were 4×6, I wanted each page to be 3 1/2″ x 5 3/4.” Thus, I cut my paper to be 7″ x 5 3/4″, to account for the fold.
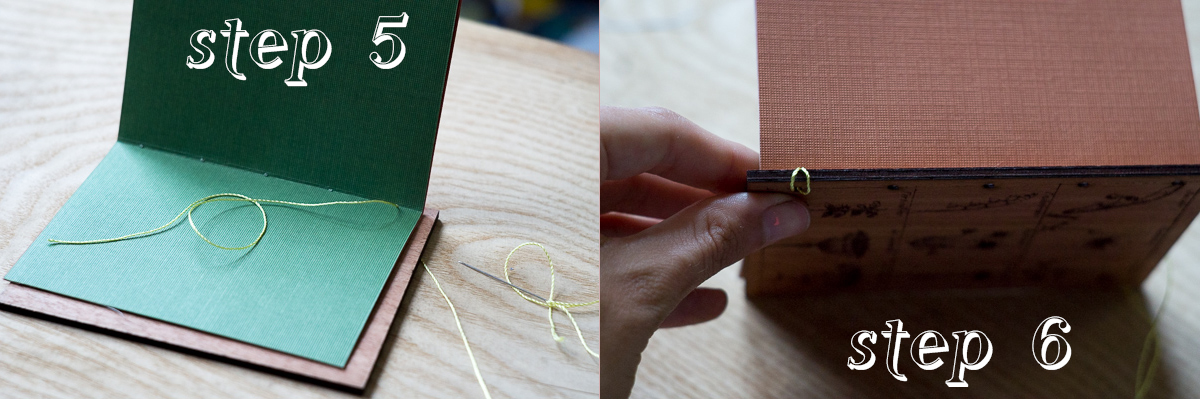
Step 2: Fold each piece of paper in half, then nest 2-3 sheets together to create a signature. Since the paper I used is quite heavy, I only made 3 signatures. Also, laziness.

Step 3: Use your bone-folder to really crease that sucker. It’s important to get these as flat as possible.
Step 4: Next, you’re going to create holes in your signatures for sewing. If you have an awl, this will be a lot easier, but you can use anything sharp- a needle, a thumb tack. Just make sure it’s lined up with the holes in the book boards.
Step 5 and 6: Ok, sewing time. Open the first signature to the center seam and line it up with the front book board. Insert the needle through the first hole in the signature and around the outside of the cover, wrapping the thread twice around the cover, as seen in step 6. If you are using super heavy thread, once is enough, but I like the extra stability the double-wrap offers.
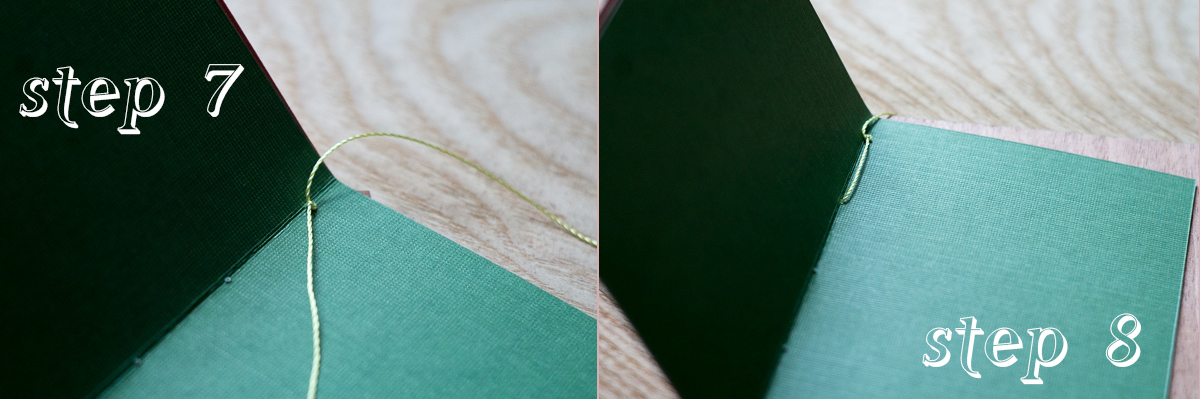
Step 7: After wrapping twice, come back through the first hole of the signature again and tie a knot.
Step 8: Move onto the second hole- as you can see, you will have a long stitch in the middle of the signature.

Step 9 and 10: Repeat the same wrapping you did for the first hole, wrapping twice around the cover then coming back through the hole in the signature.
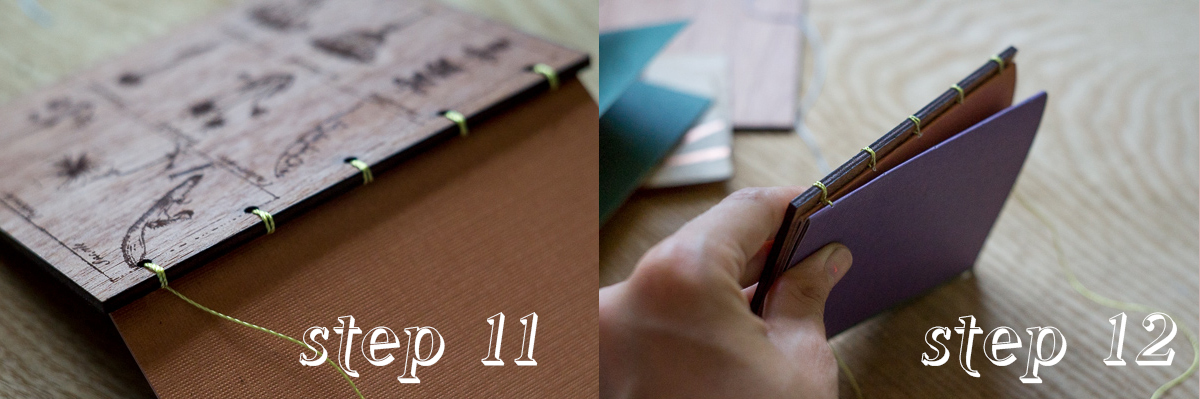
Step 11: Repeat for all 5 holes. When you get to the last hole, do NOT sew back through to the signature. Make sure all your stitches are tight and well aligned.
Step 12: Now you add your second signature. Rather than going back into the first signature after the double wrap on the last hole, sew into the last hole on the second signature. Make sure your thread is taught and there’s no wiggle room, or your book won’t hold together.
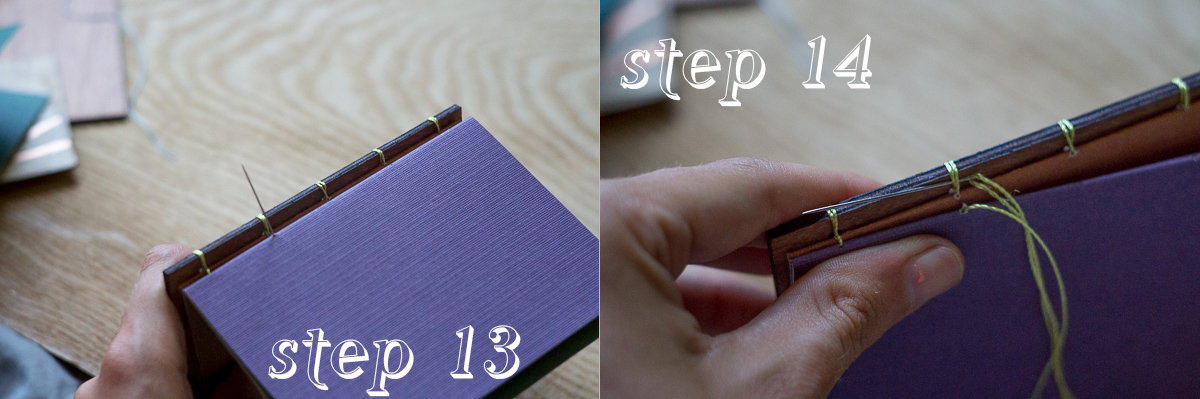
Step 13: Move on right away to your second hole in the new signature, creating your long stitch on the middle seam as you did for the first.
Step 14: This is where things get crazy. Now, rather than wrapping around the book board, you are going to start to create your chain stitch. Insert the needle between the book board and the thread loops. You can go right to left or left to right; just keep it consistent. Tighten your stitch- once tightened, it will start to look like a chain.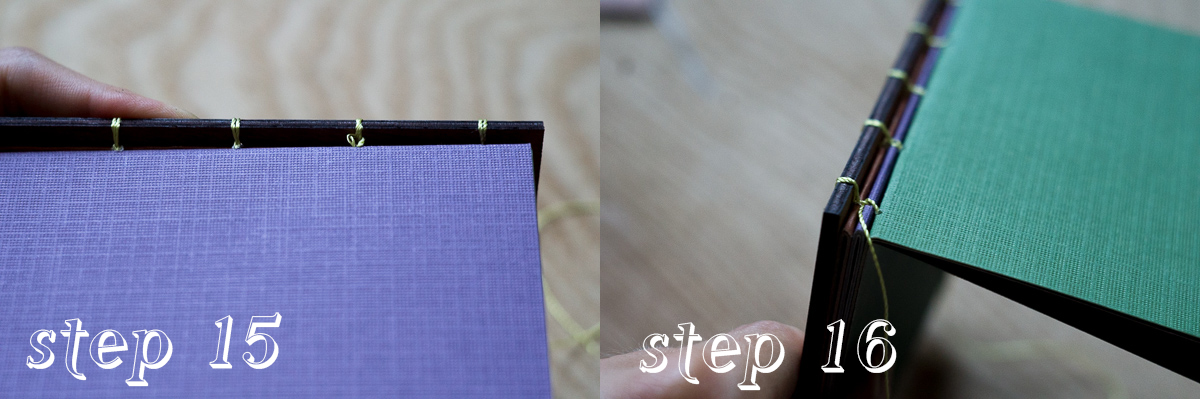
Step 15: Move along the signatures in exactly the same fashion, tightening as you go. In the picture, I left the stitch a little loose so you can see what it’s supposed to look like.
Step 16: When you add your third (and 4th and 5th) signatures, you are going to continue building your chain. Don’t continue to loop between the book board and the thread though- on subsequent stitches, you loop around the last stitch only. If you have a curved needle, this will be 1000x easier. Continue in this manner until all your signatures are secured.

Step 17: To add the back cover, repeat the steps you did for attaching the first signature to the front cover. You’ll end up with a row of double stitches in the middle of your last signature, but that’s ok. After the last hole, tie a secure knot- a dab of glue might even be useful if you’re worried about it coming undone.
Voila! A sweet little book. And in only 17 steps!! Now, time to get going on 125 of these, right?
Right??