DIY Avedon
Although I love the man with all of me, the idea of having to pose in cute and loving ways with Nick in front of another human being gives me hives- hives that are only compounded when you add in, you know, a camera. And passerbys. No thanks. Even posing for a normal “say Cheese”-style picture makes me a little anxious. This is an insecurity that I’ll need to sort out by next June, I know. In the meantime… we needed to get creative for our engagment pictures.
Looking longingly into each other’s eyes at the Brooklyn Bridge or sprawling in a field of wildflowers, while great for a lot of people, is pretty decidedly not our style. I can’t imagine my no-nonsense Vulcan being down for that.
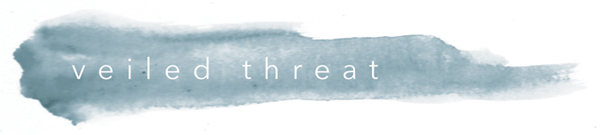
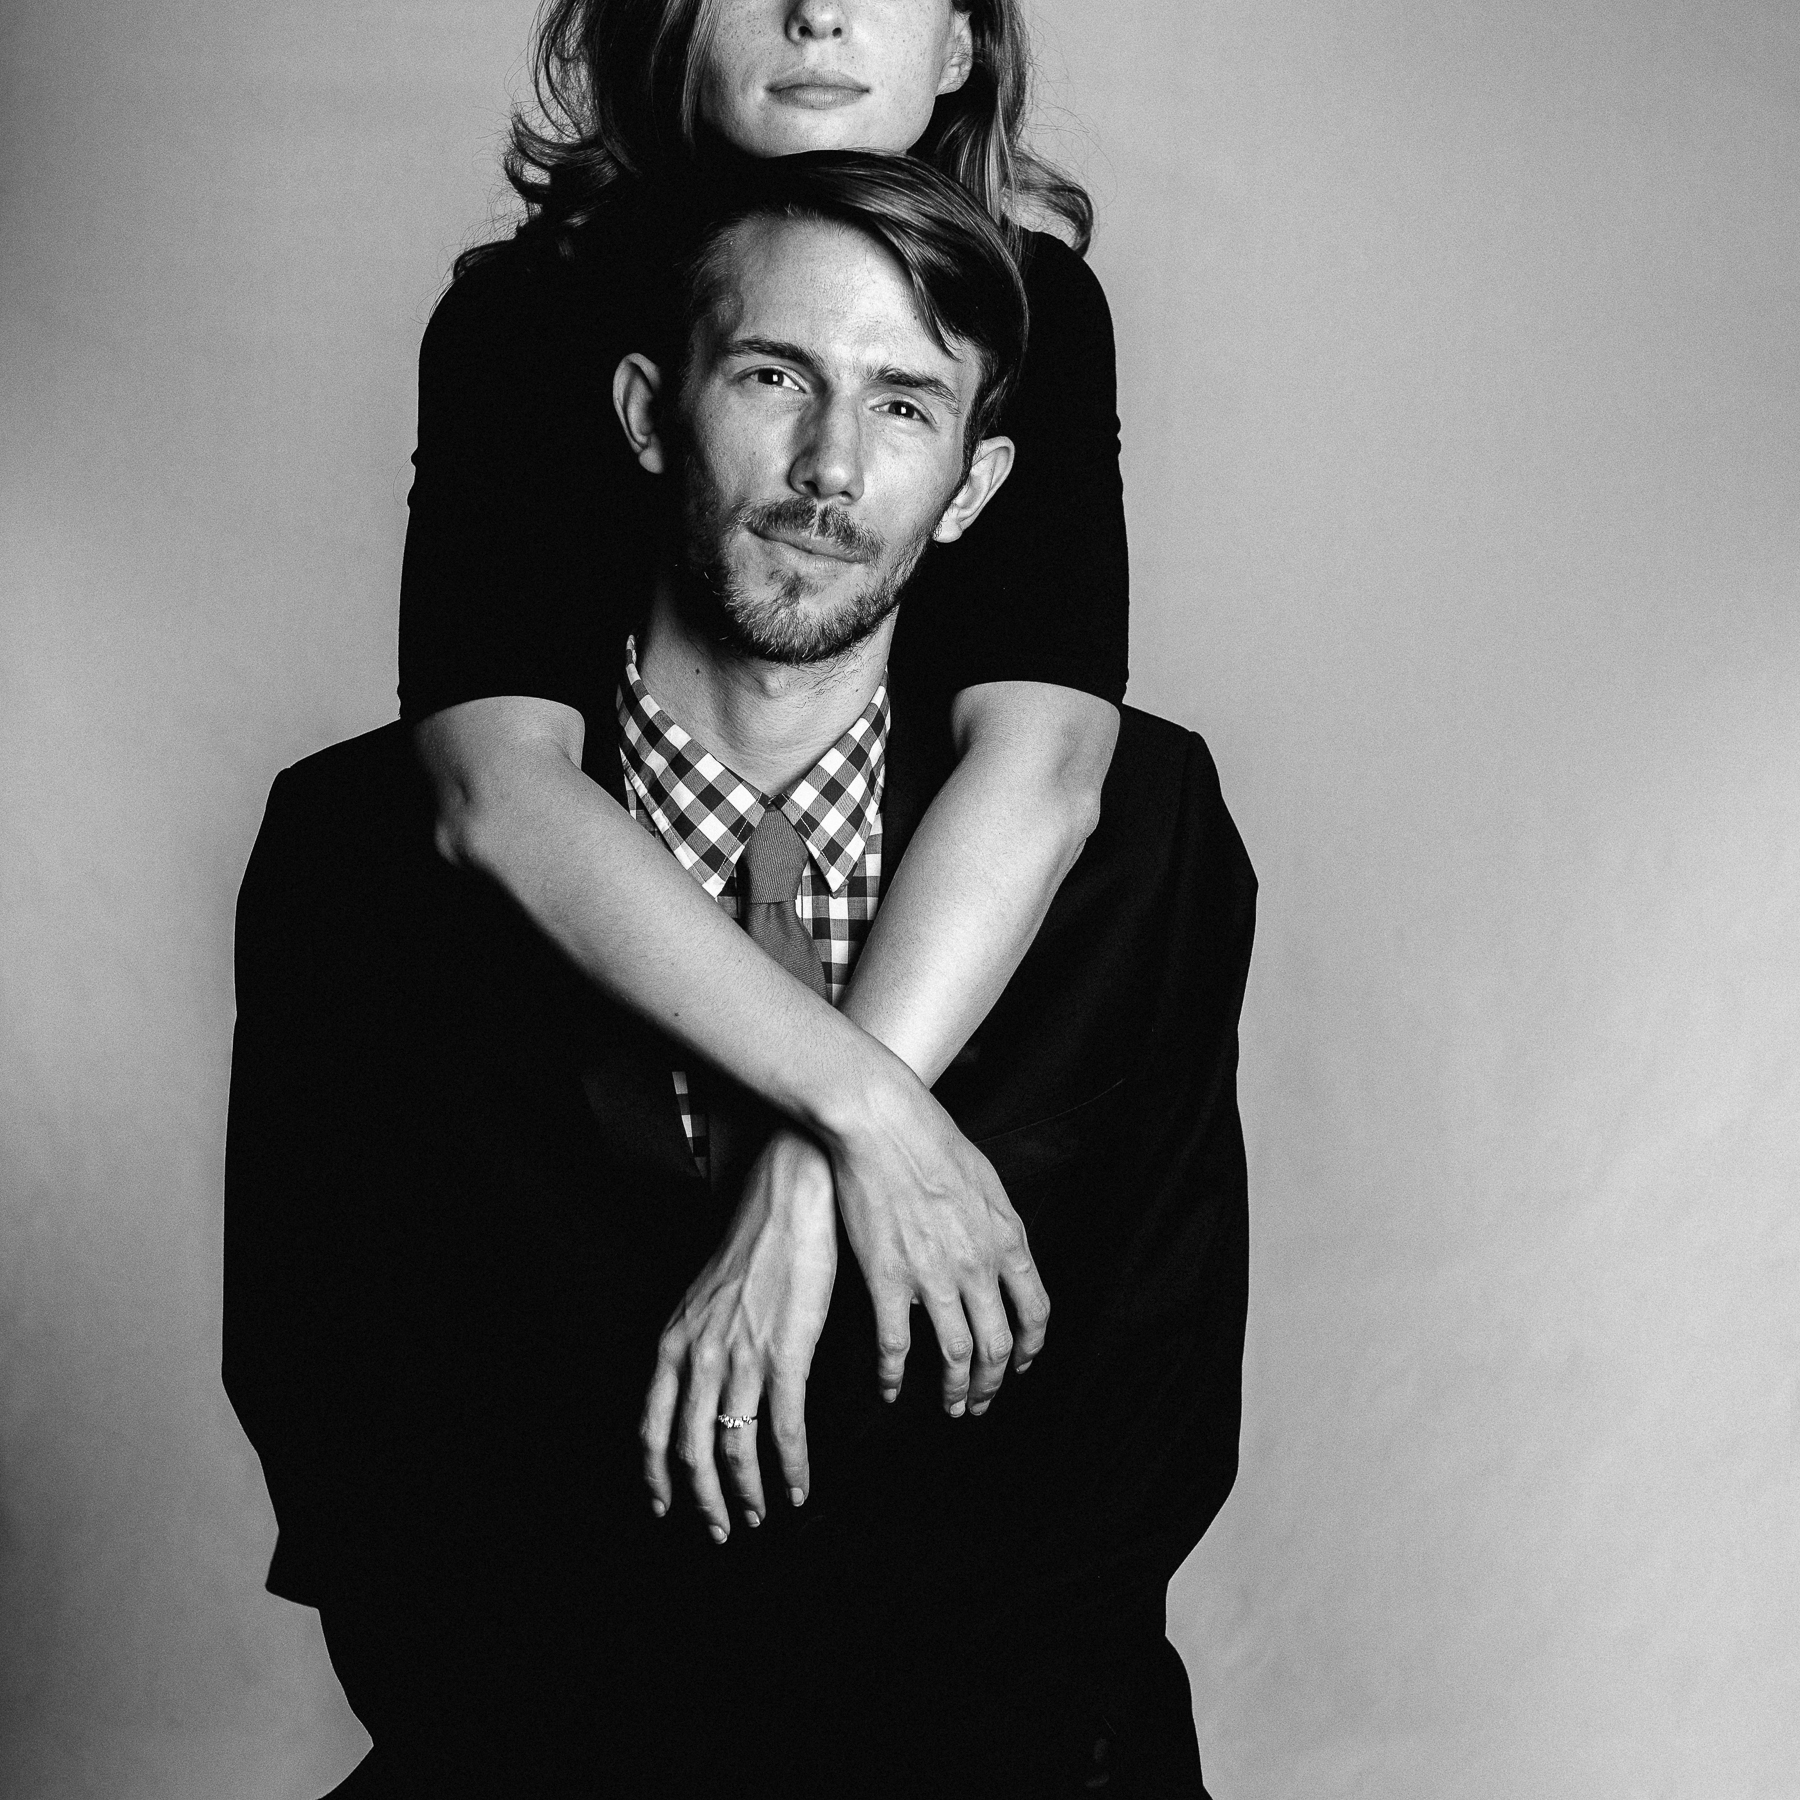
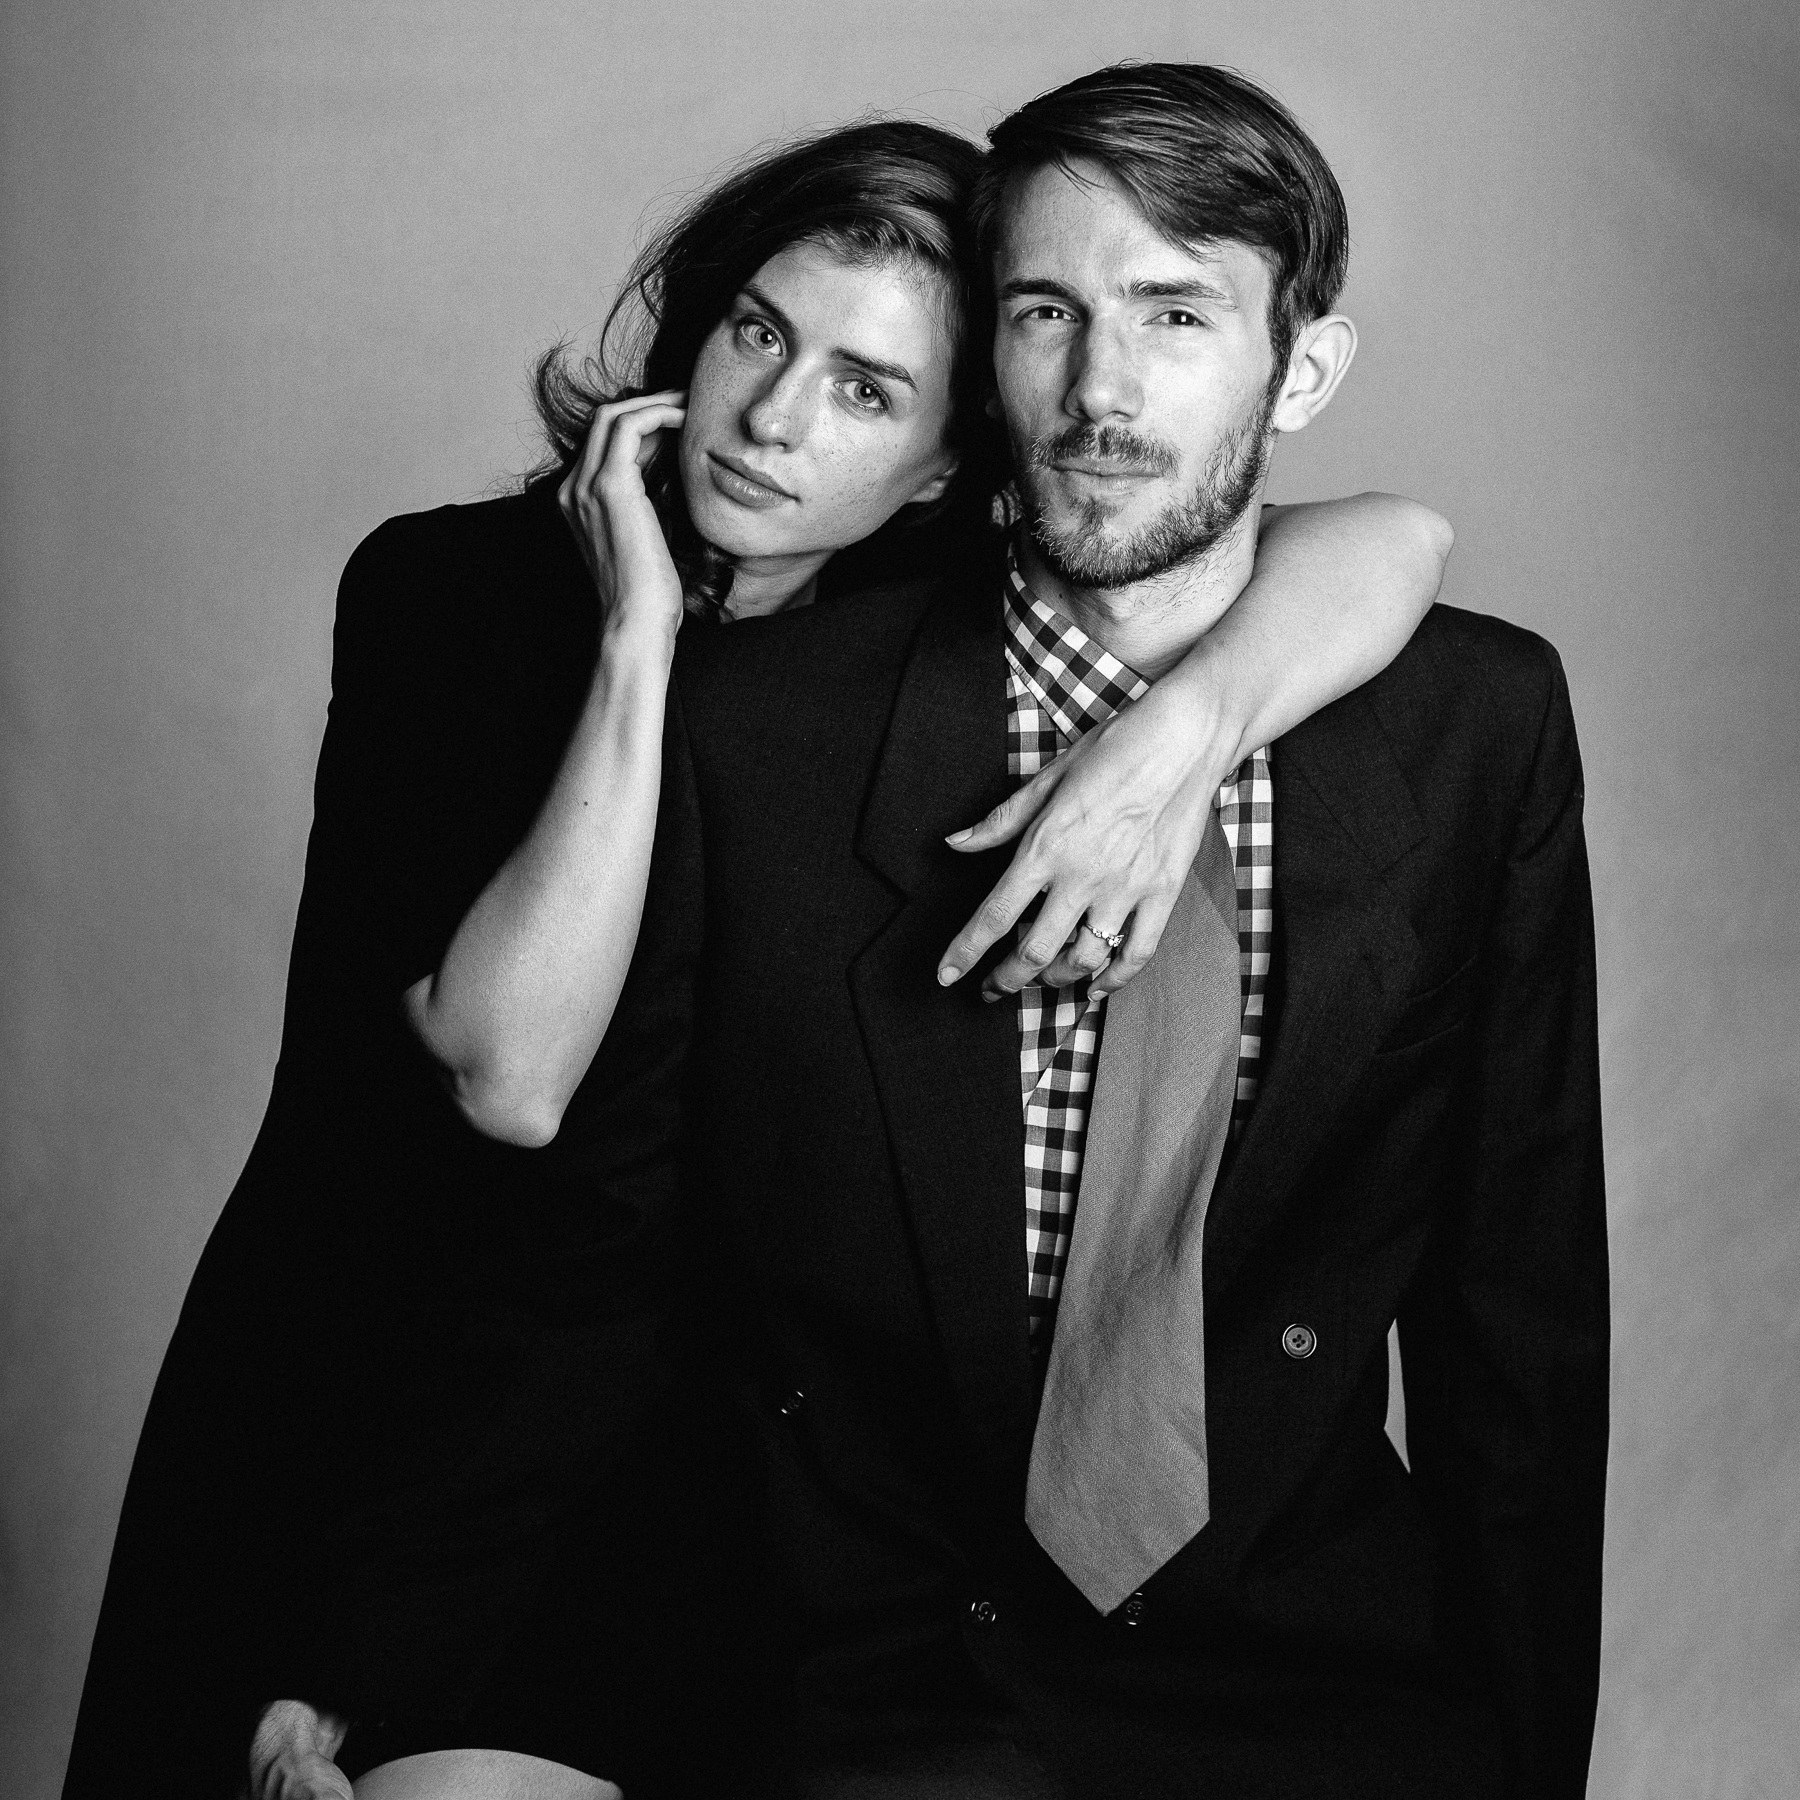
And I’ve really been feeling studio shots lately. I like the gravitas they lend, and I think in a world of Instagram and ubiquitous cameras, a more formal portrait feels special. Irving Penn and Avedon, the masters of the studio shot, served as the inspiration for our project. But how to cop the style without the expertise and the equipment?
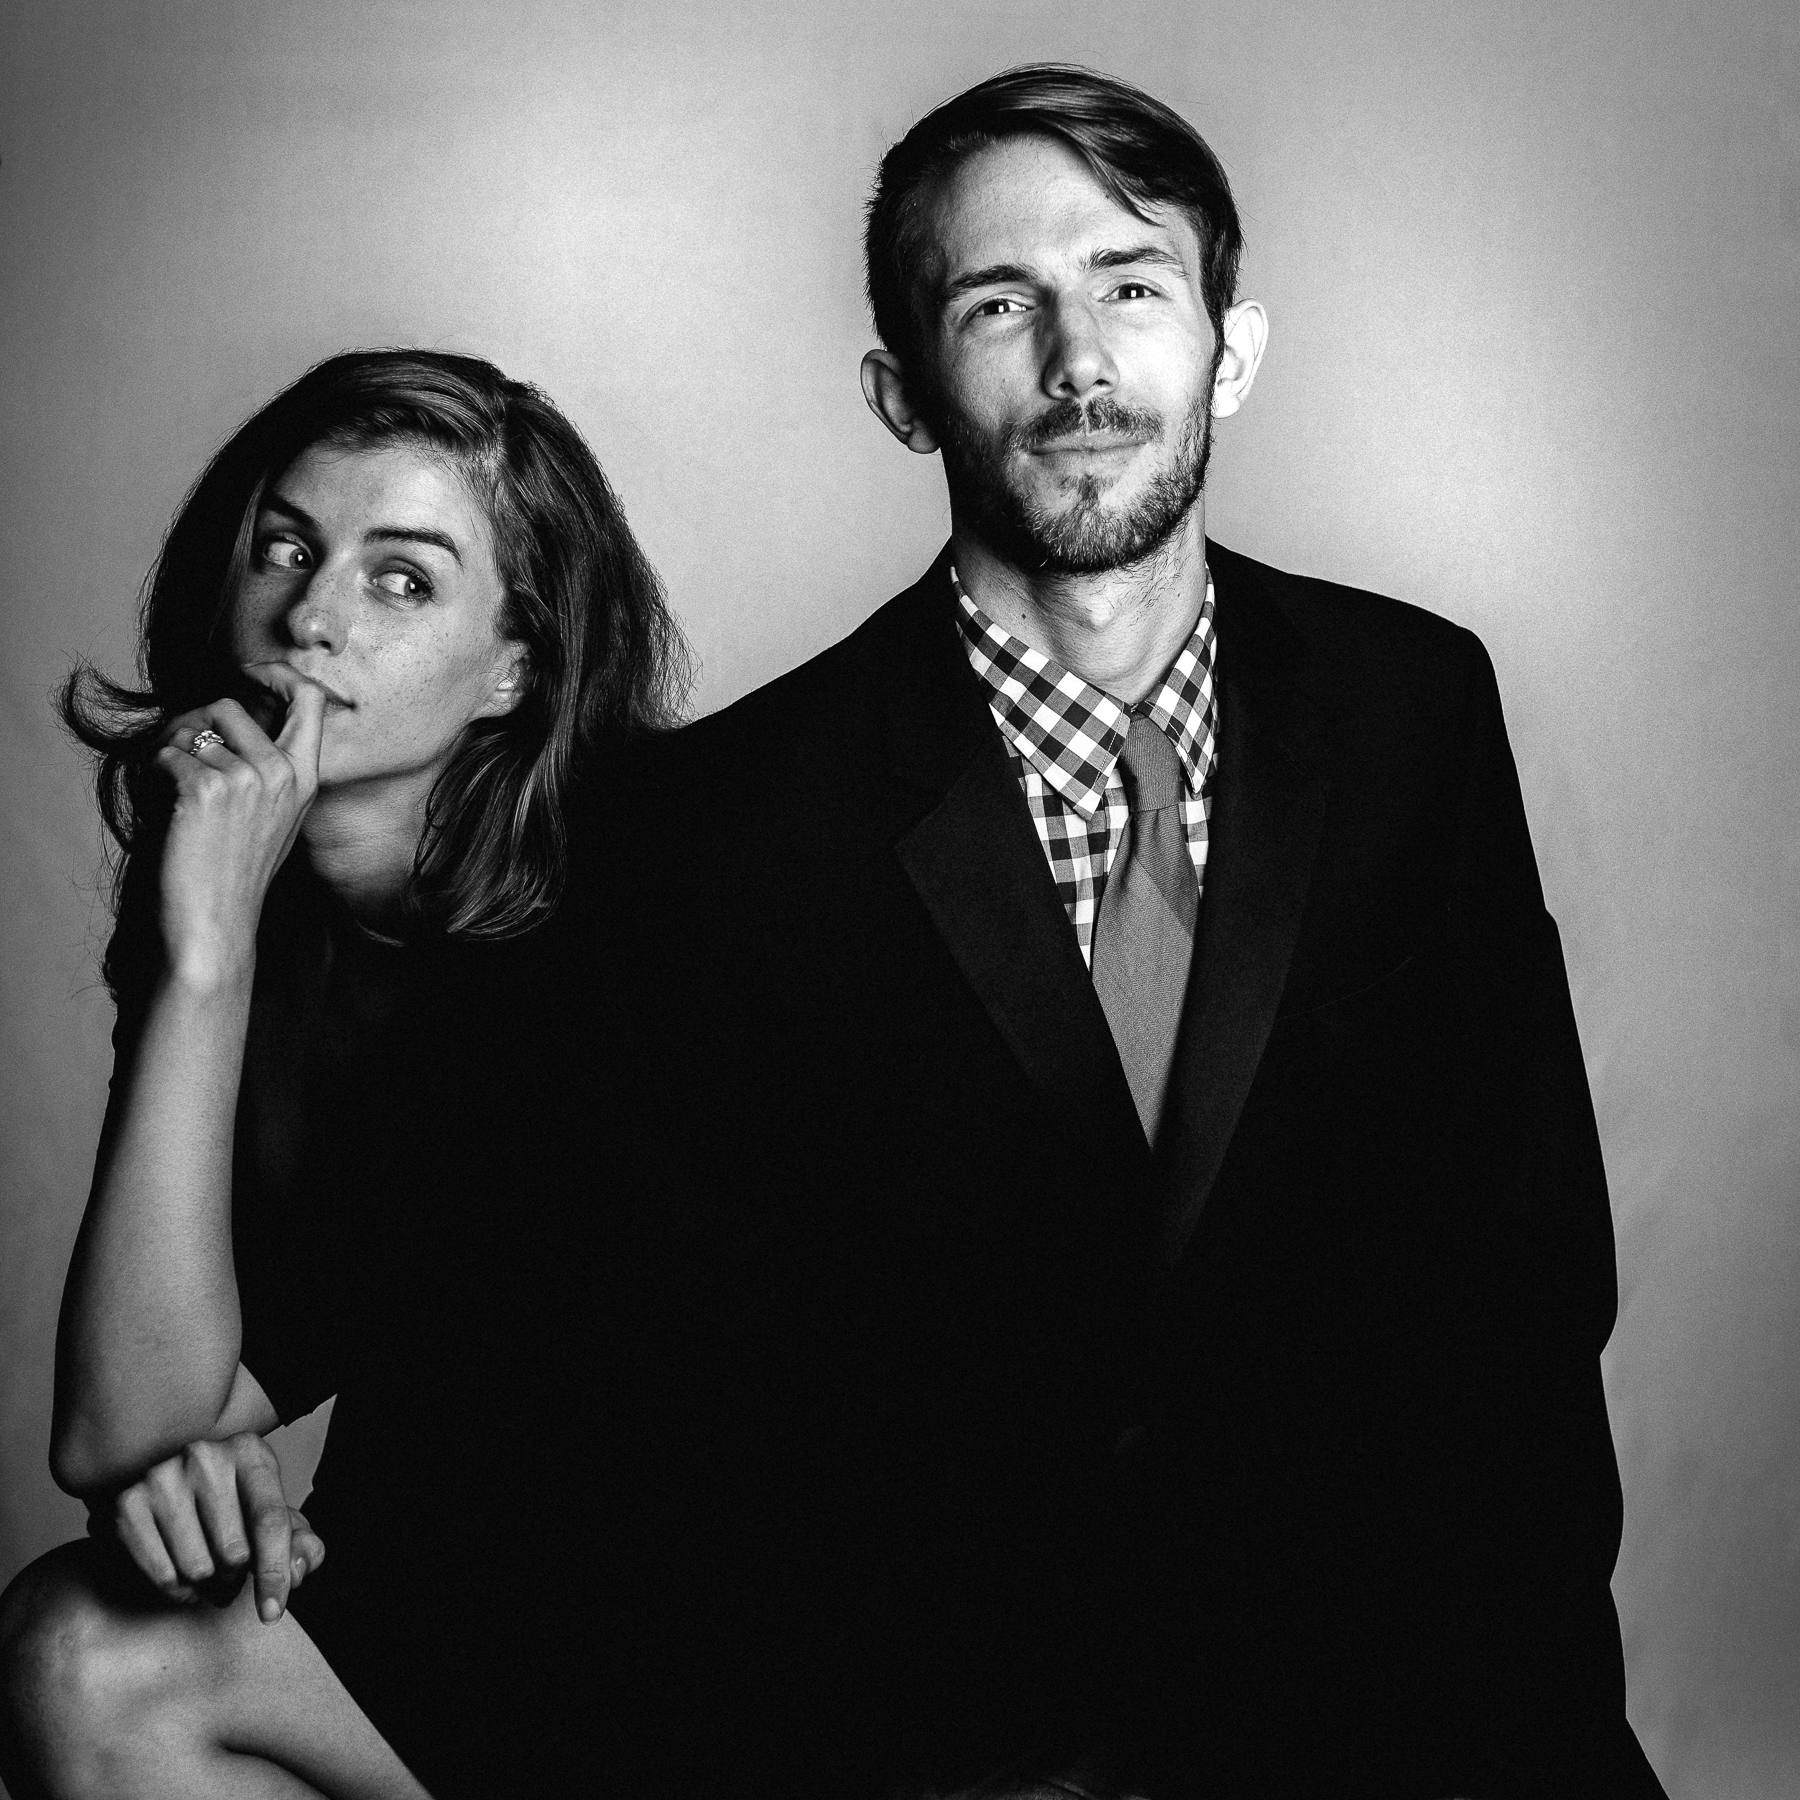
I wish we could say that we planned this really well- but the reality is, the night before I wanted to do these pictures, Nick and I sat down and talked logistics for the first time. Very quickly, the conversation turned discouraging and stressful- we had no backdrop, no lights, and almost no time to execute. We pretty much had a camera and ourselves. There was discussion about buying lights and a softbox- a pricey endeavor- at a local camera store, with the intention that we’d reuse them for the wedding.
The next day, we headed to Art’s Camera in Milwaukee. In an uncharacteristic stroke of luck, they had a ton of lights for rent- we ended up picking up a kit that had two studio lights with stands, two softboxes, and a trigger for $30- at least a 1/10 of what I was expecting to have to cough up. Armed with those lights and 5 yards of light gray broadcloth, we headed back to my parents house to try to construct a studio in their family room.

While Nick assembled the lights and set up the camera, I did my best to iron the broadcloth. Without a steamer, it was nearly impossible to get the wrinkles out of 15′ of super-wide fabric- so I ended up stretching the ironed fabric over the wall and tacking it in place with small nails. It wasn’t perfect, but it was surprisingly effective, and nothing that Photoshop couldn’t fix. We aimed one light at the backdrop (photo above); the other was placed directly in front of us (picture below).
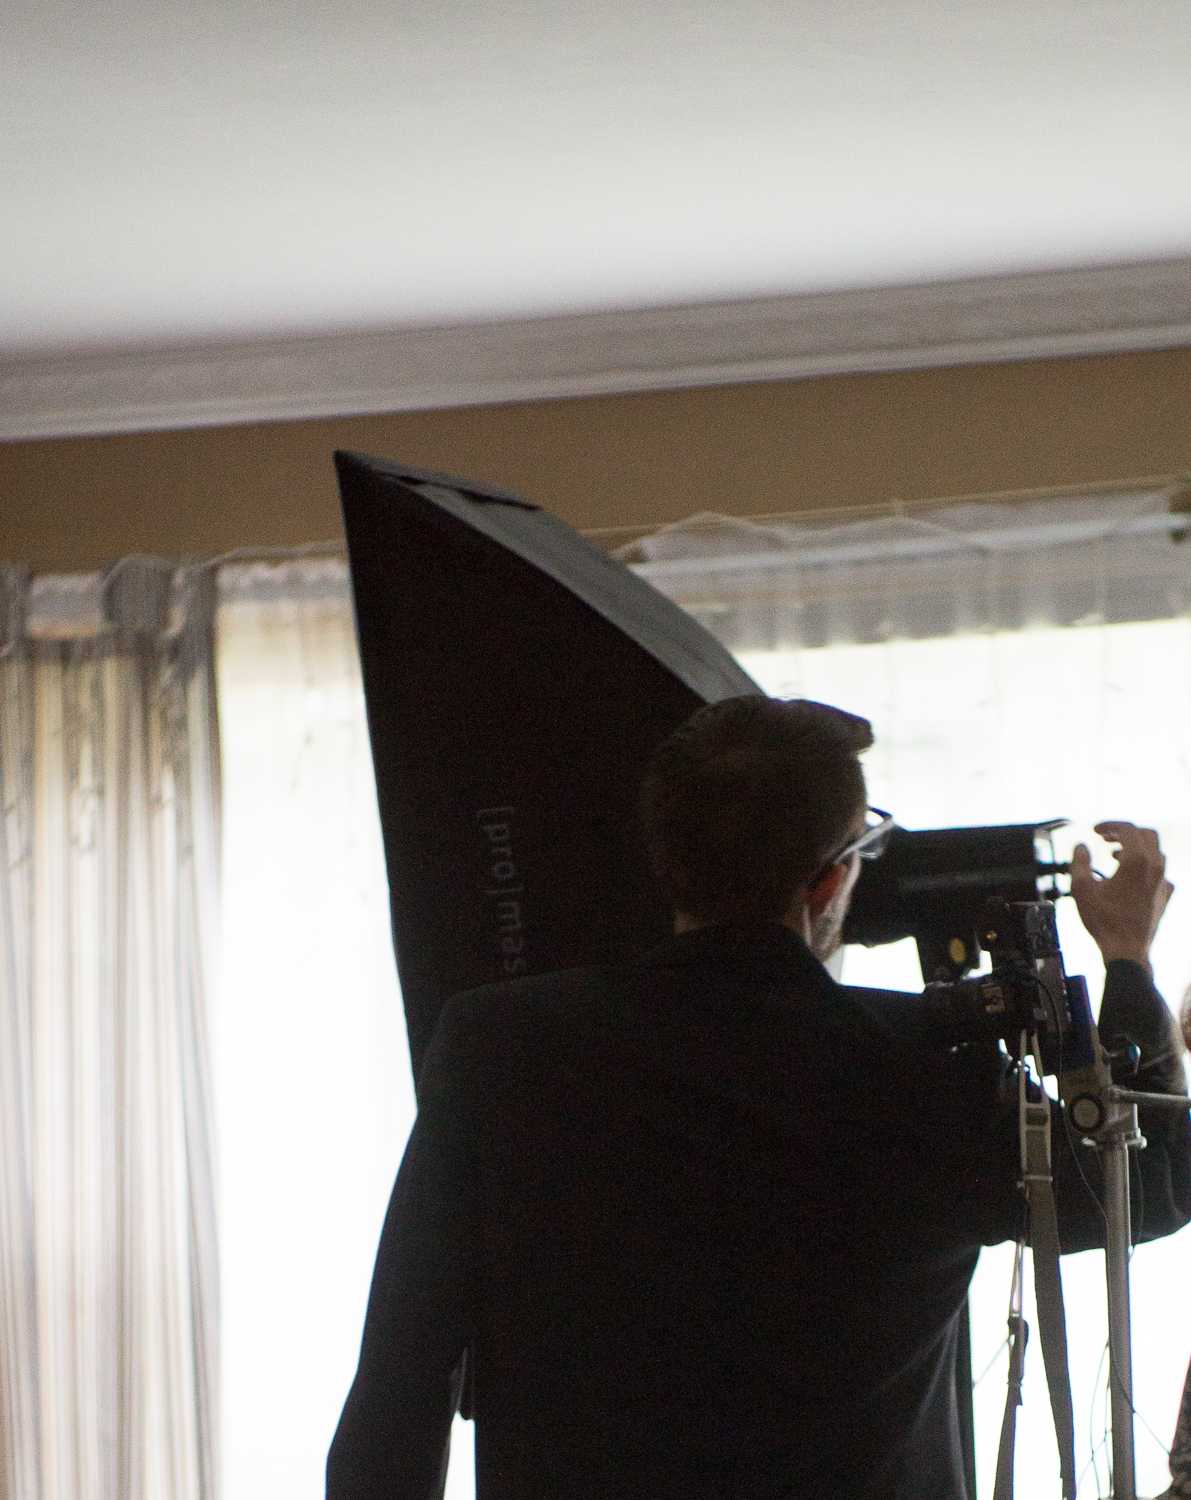
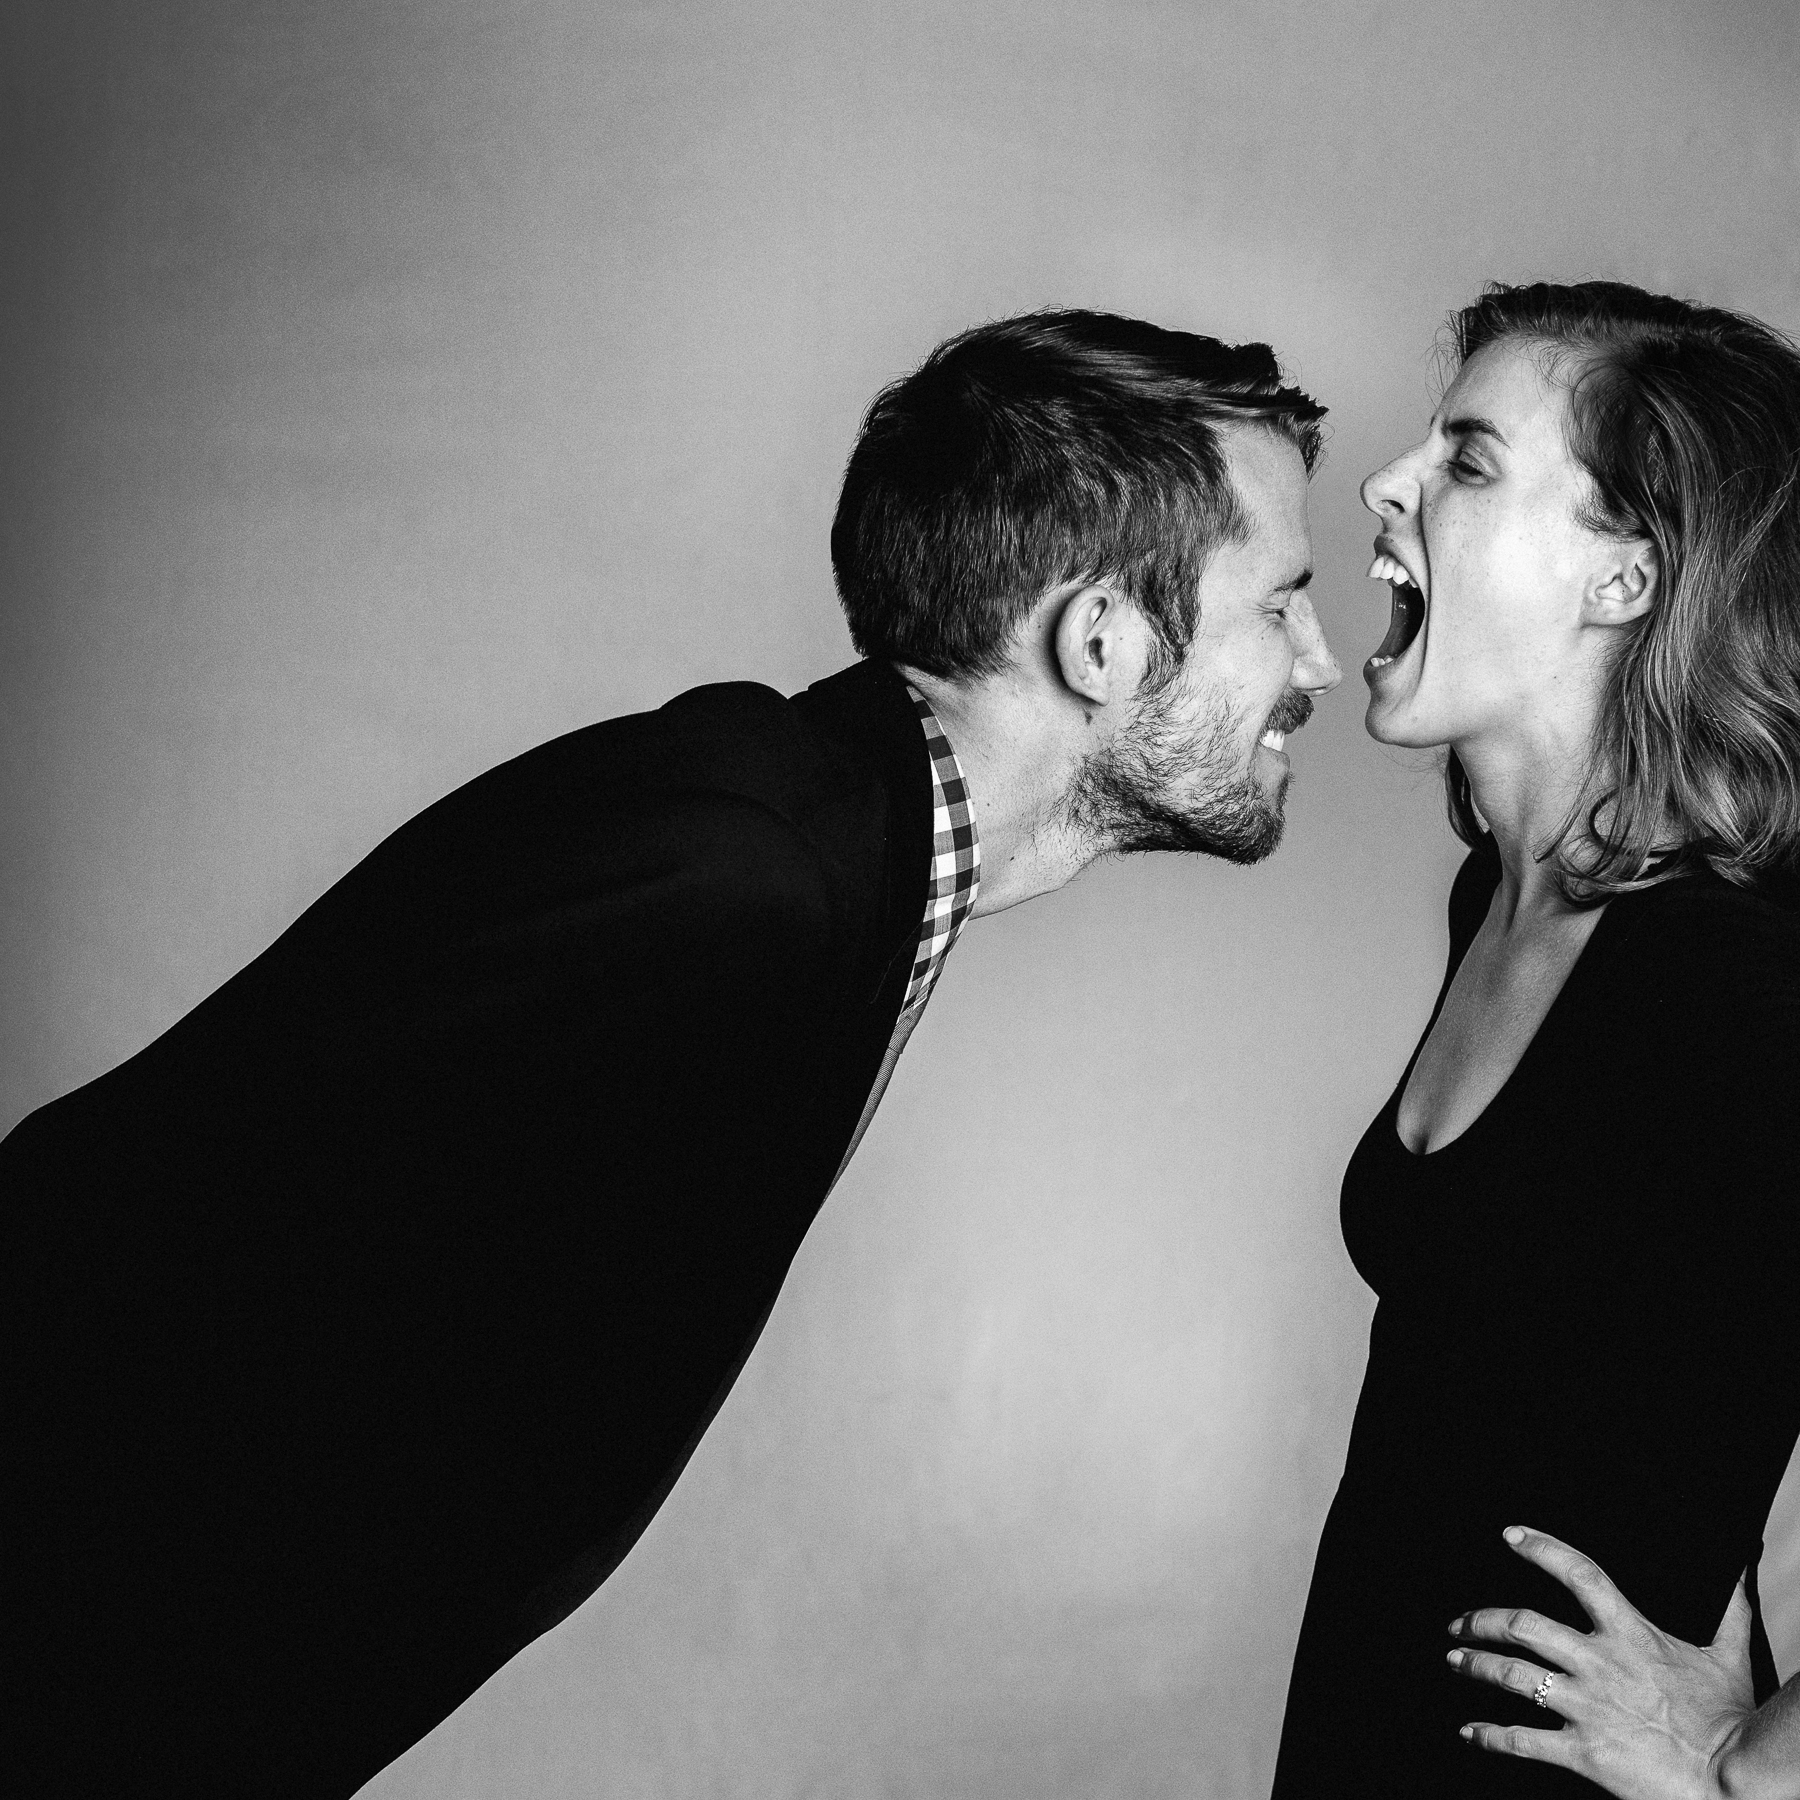
With Nick’s Sony A7 rigged to send the pictures straight to his laptop, he created a makeshift shutter release with his mouse and a piece of duct tape. After a few last-minute attempts to tame our hair (not so successful), Nick tossed my 17-year-old cousin’s tuxedo jacket on top of his shorts and we stepped in front of the camera. The first 20 or so pictures are 100% goober- but since it was just us, I didn’t mind. Every couple minutes, we’d take a moment to go look at the shots we took, assess the lighting, focus, and what we were doing wrong, then reset and try again.
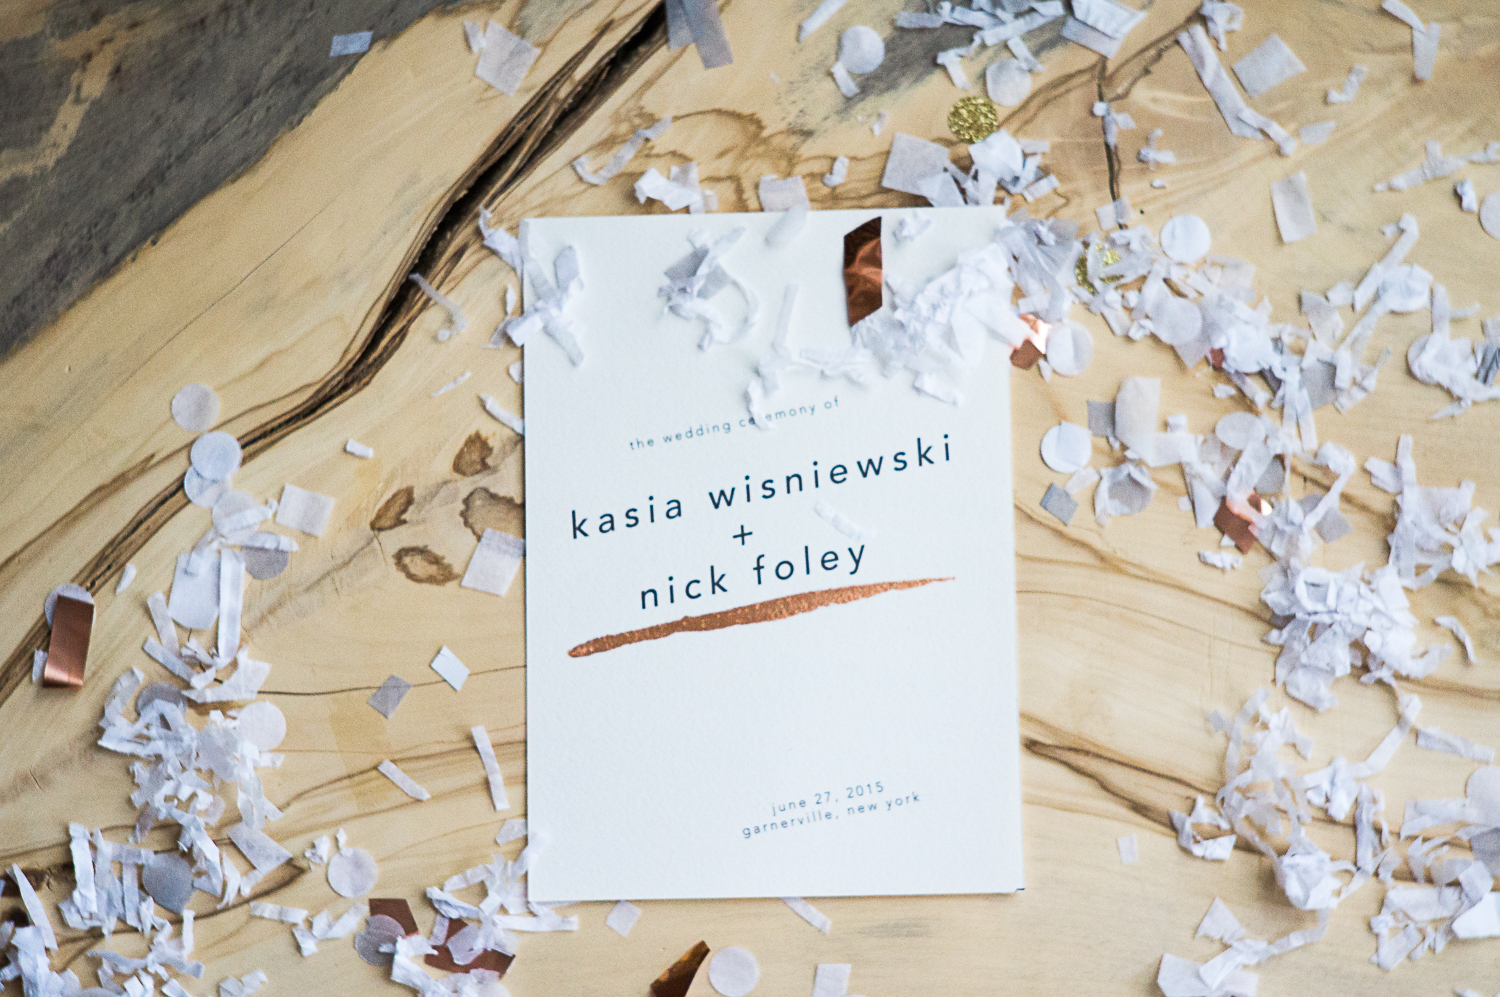
This one’s going on the cover of the invite.
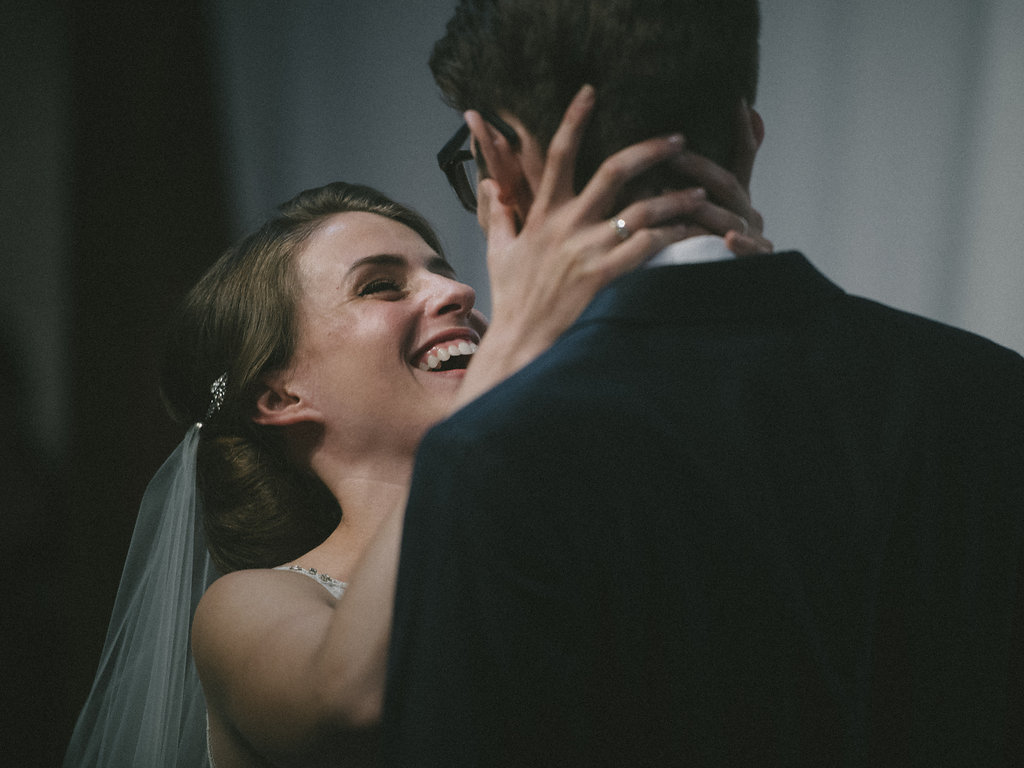
It was- dare I say it?- fun. And I love how they turned out. With no one to direct us, we just did what we normally do- goof around 90% of the time and pose broodily the remaining 10%.
And who knew Nick knew how to Smize?
50 Shades of Player: The Unauthorized Nick Foley Story (Possible book title?)
WHAT WE USED:
Backdrop: Cotton Broadcloth, Joann Fabrics (5 yds for $35)
Lights: We rented this kit for $30 from Art’s Camera Store in Milwaukee, WI
Camera: Sony A7, with Voightländer 50mm lens

Great post!Thanks for sharing.