
Never Enough Shine- More Foil Fun
So with a bit more testing, I’ve started getting more consistent results with the DIY foiling. I’m ALMOST comfortable starting to use this for real stuff.
For your consideration, an easy step-by-step:
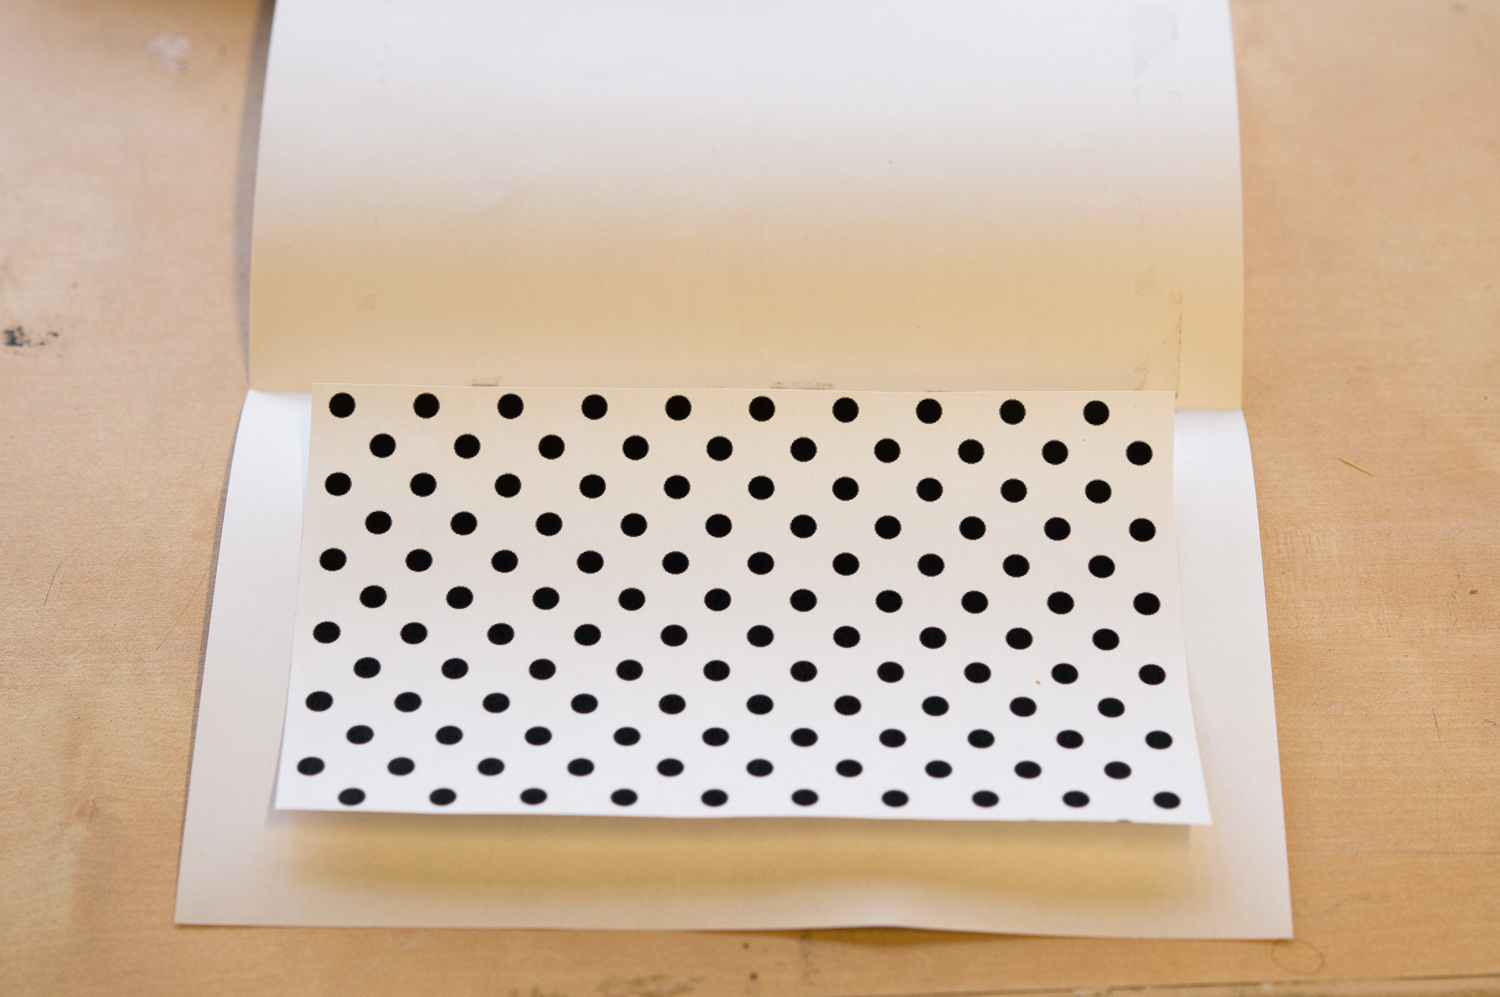
1. Print your artwork with a laser printer. Use the highest possible quality settings- more ink=better results.
2. Create a little carrier folder for your artwork. Although I haven’t actually tried just putting the foil and the artwork into the laminator alone, I have a feeling it would end up in jamming and sadness, so I’ve been simply folding a letter-sized piece of paper in half to act as a carrier. Basically, it just needs to keep your s*** together.
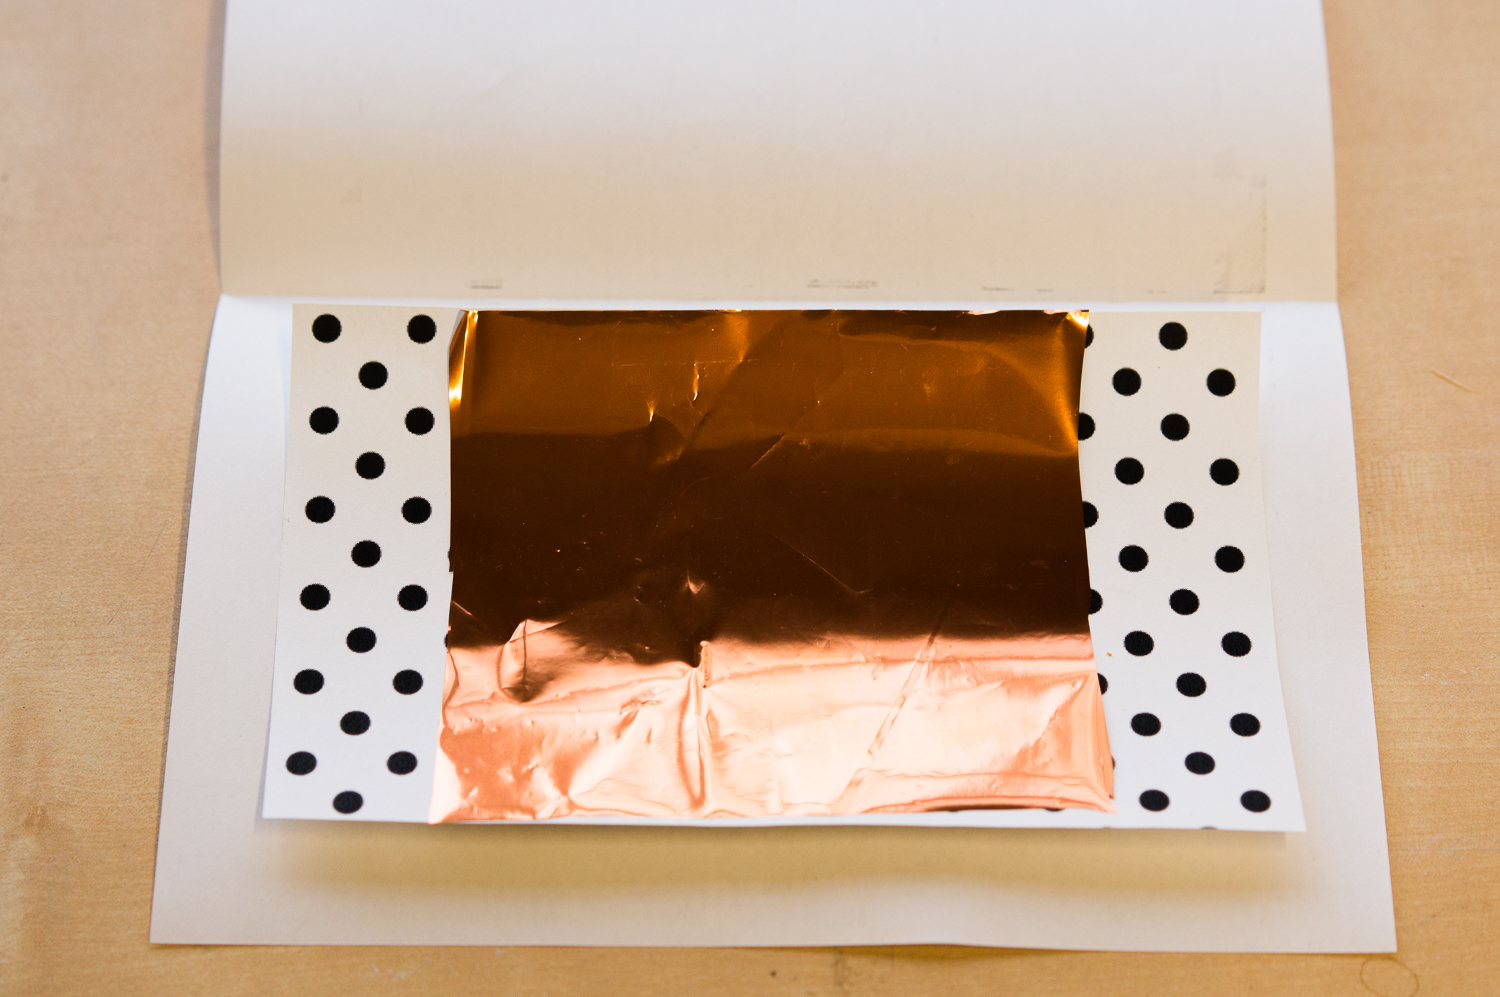
3. Cut a piece of foil to cover your artwork. Place the foil shiny side up- the toner reacts with the other side. Obviously, anything covered by the foil will, well, NOT be foiled. I used a small random piece because I’m lazy.
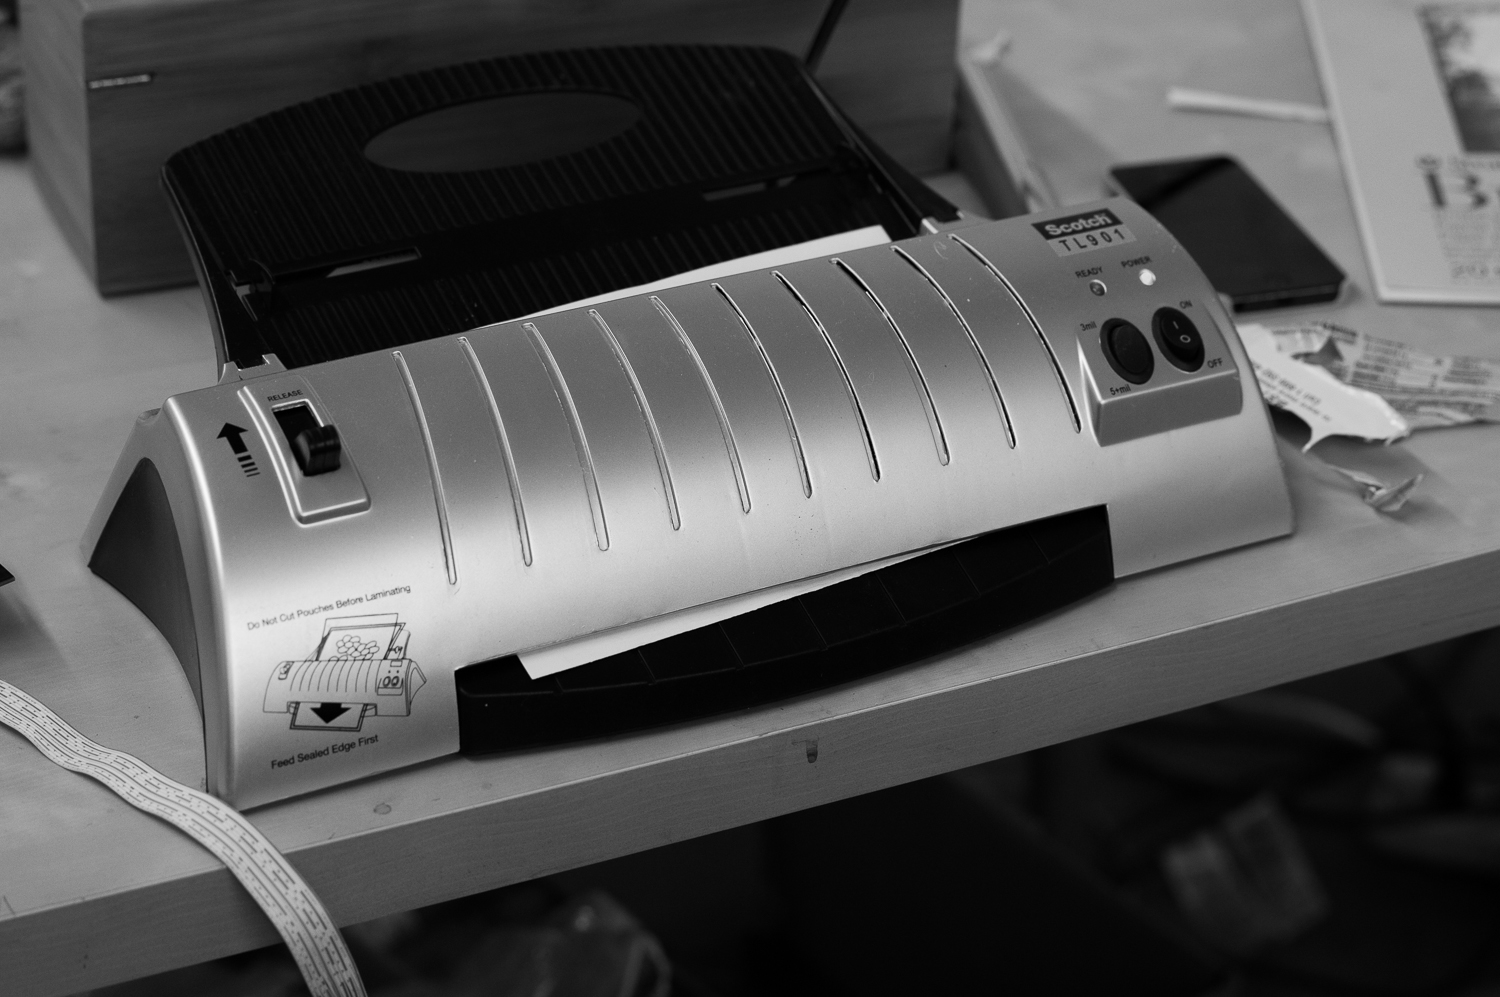
4. Close your carrier folder, and insert the piece folded side FIRST into the laminator. This is the laminator. I made this picture black and white to try to make the Butterfinger wrapper and assorted trash strewn about the table a little less obvious. Did it work?
Oh, PS, the piece goes into the TOP of the machine, and comes out the bottom. This will be obvious for most people, but I spent at least 5 minutes when I first got this trying to jam my artwork in the wrong way. It doesn’t work.
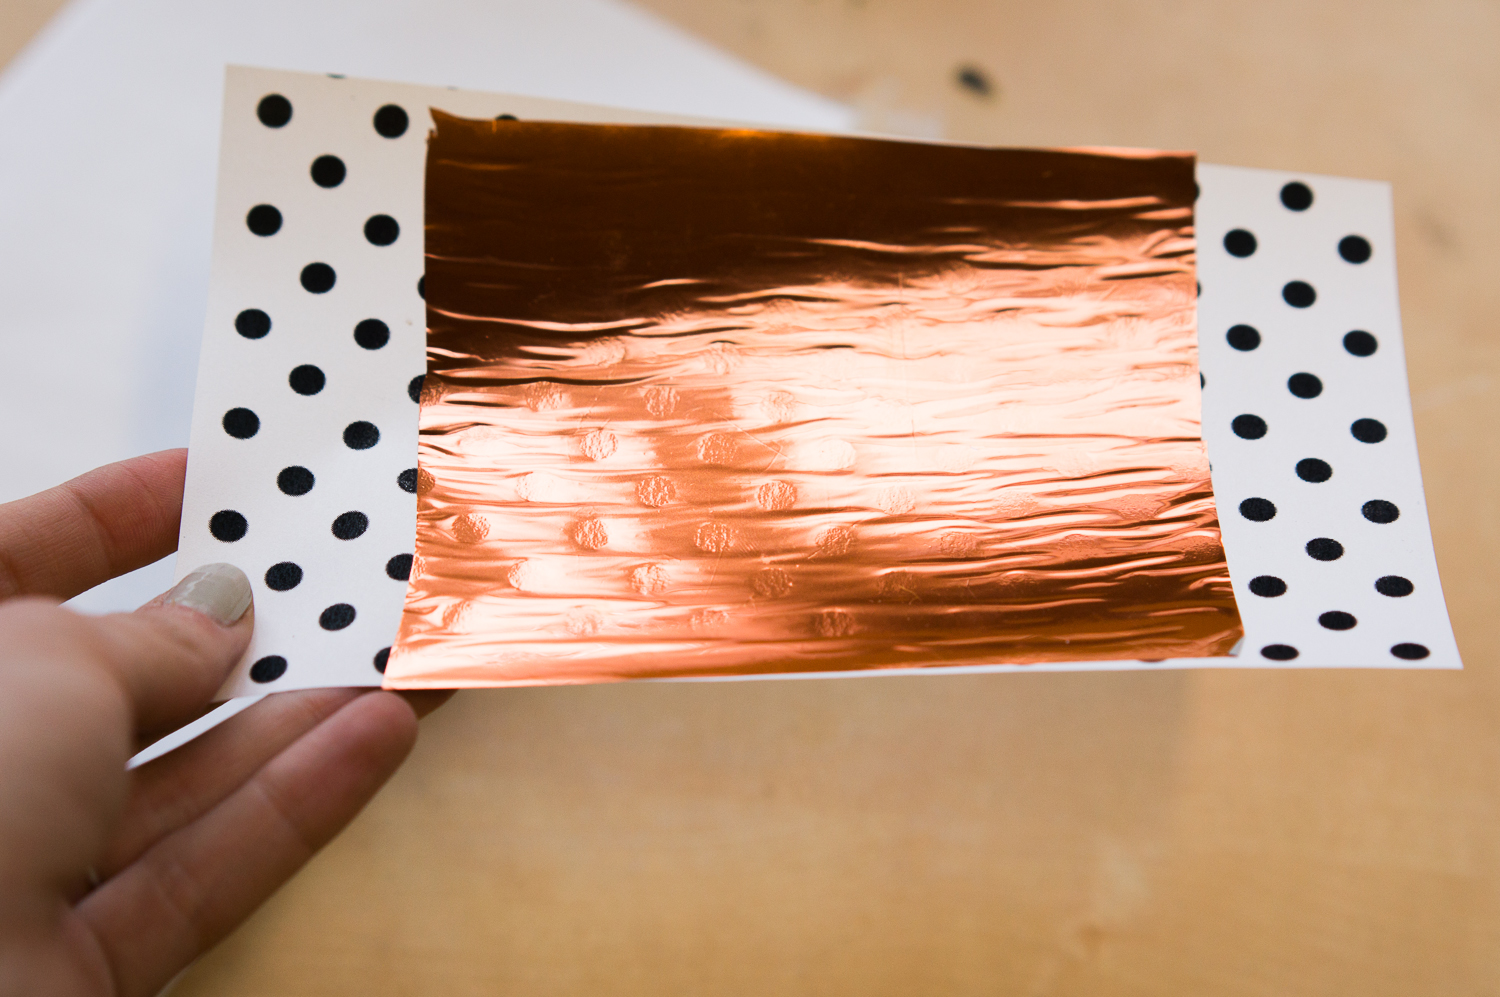
5. Once you’ve eaten all your candy bars and run your folder through the laminator (for my cheap machine, you have to run it through 2-3 times), your artwork will look like this. You can see where the foil is adhered to the toner- everything else is kind of wrinkly. Carefully peel your foil and….
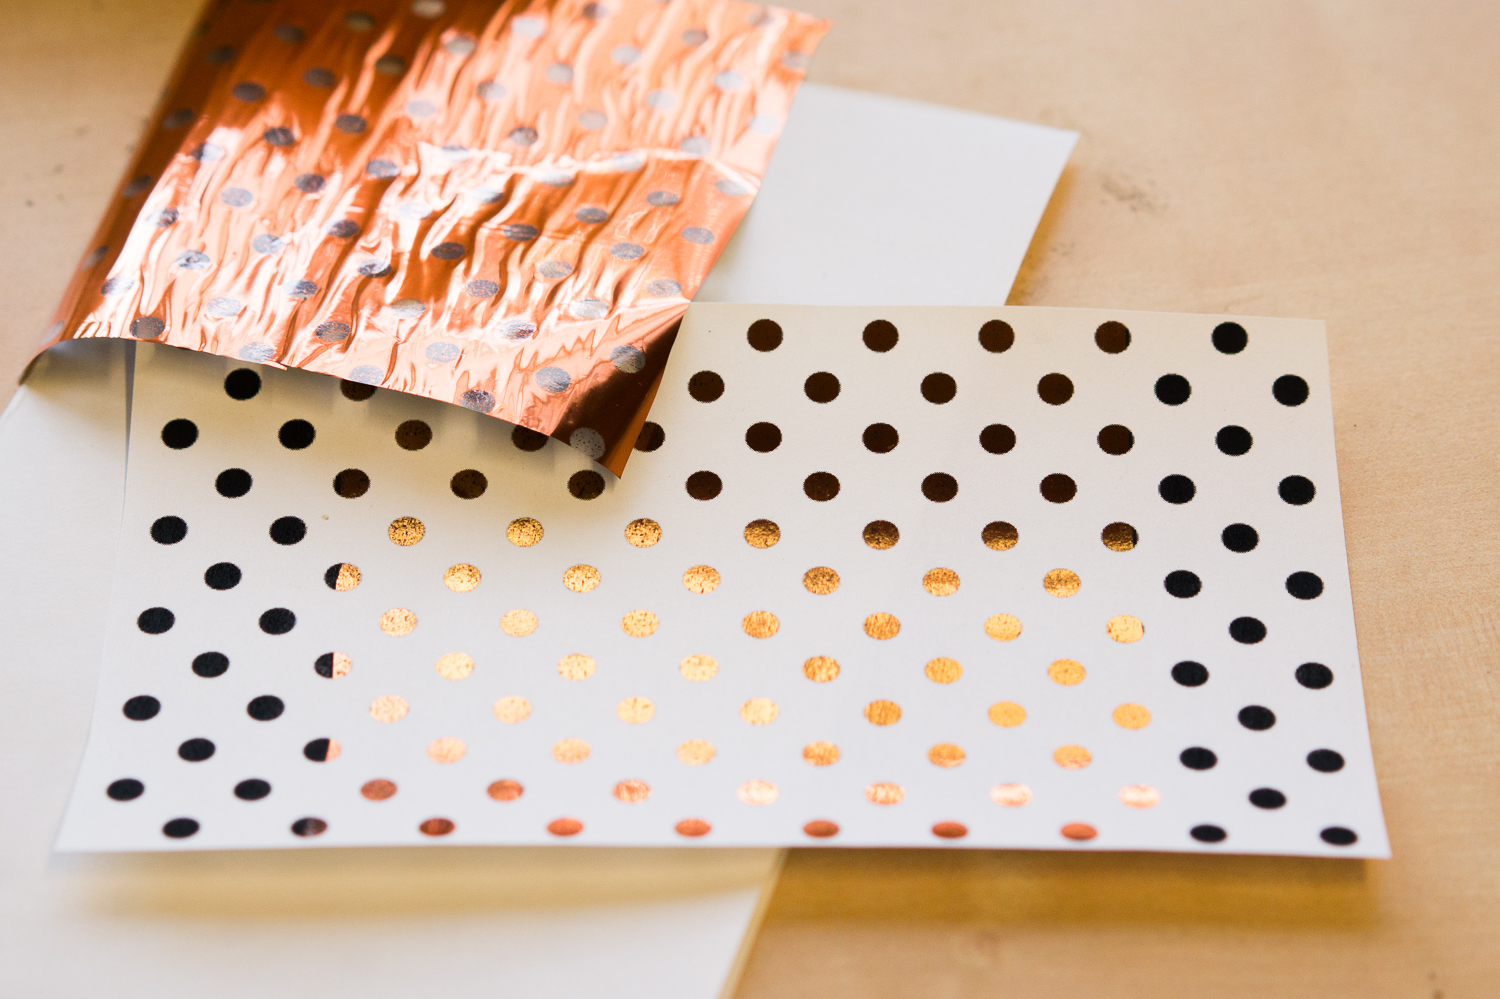
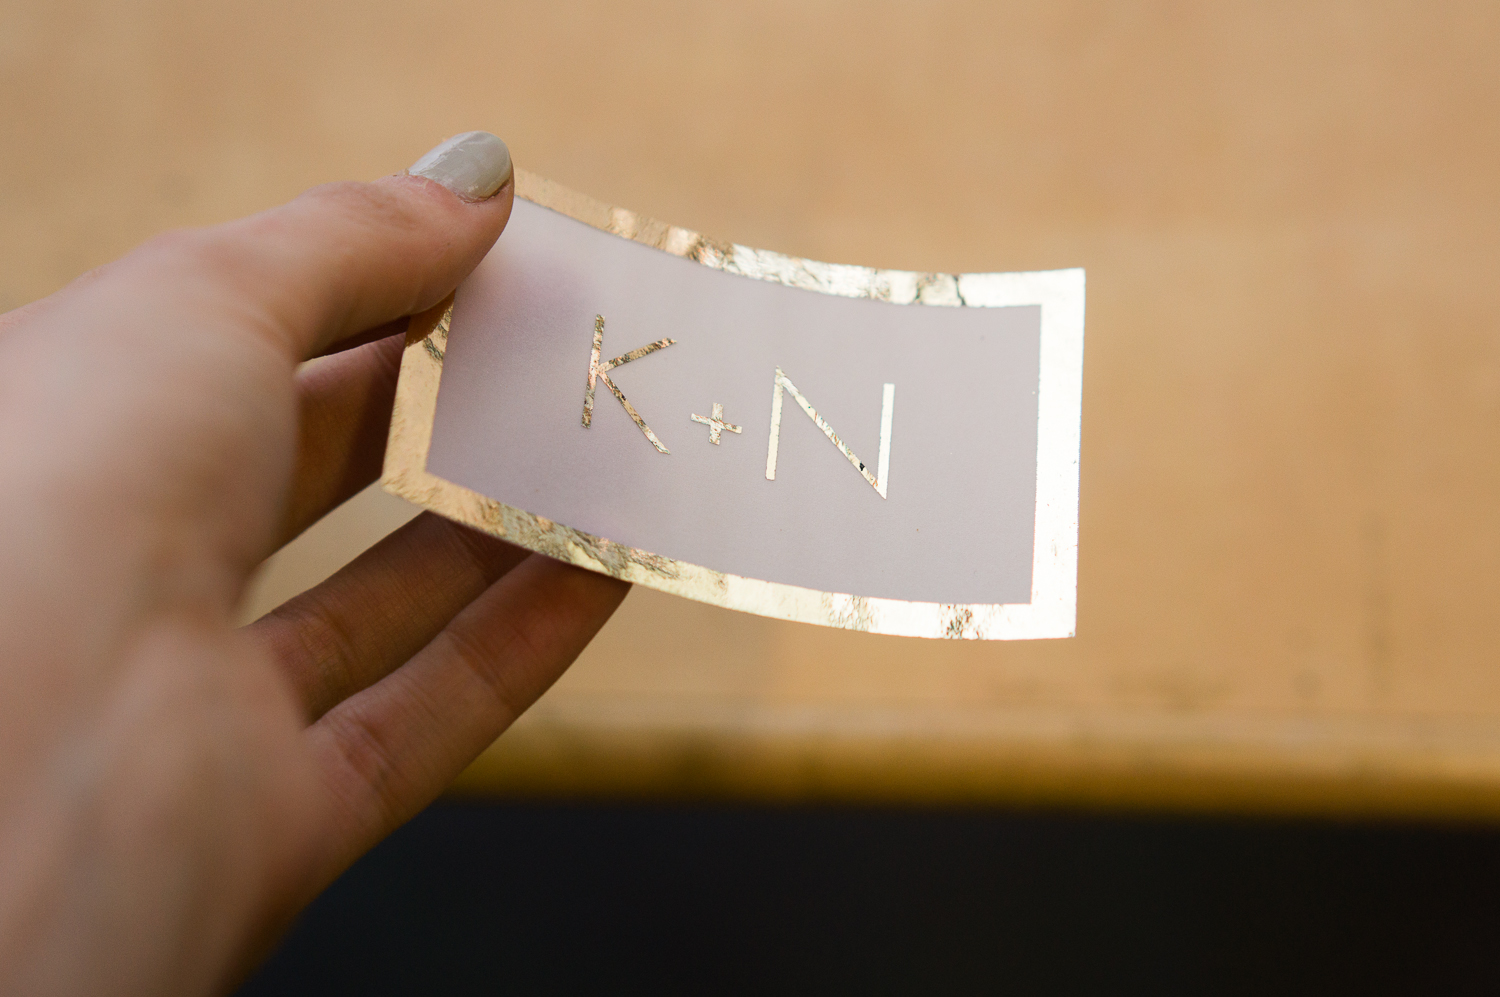
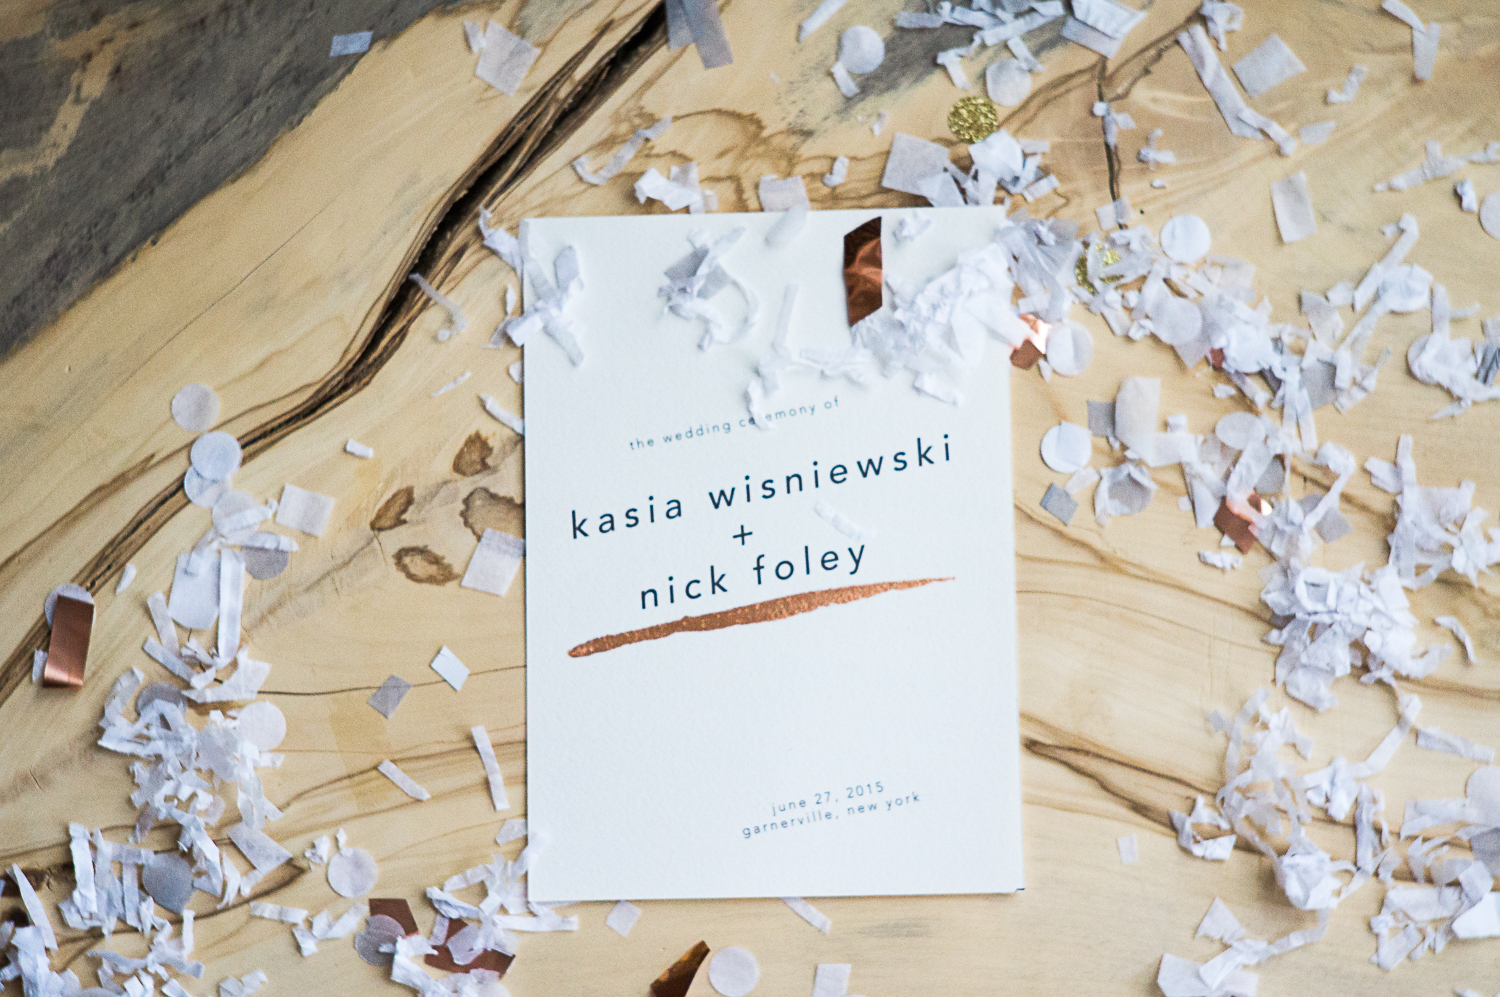
6. You’ve got (shiny) mail! It’s real hard to photograph foil, but trust me, this looks pretty fly.
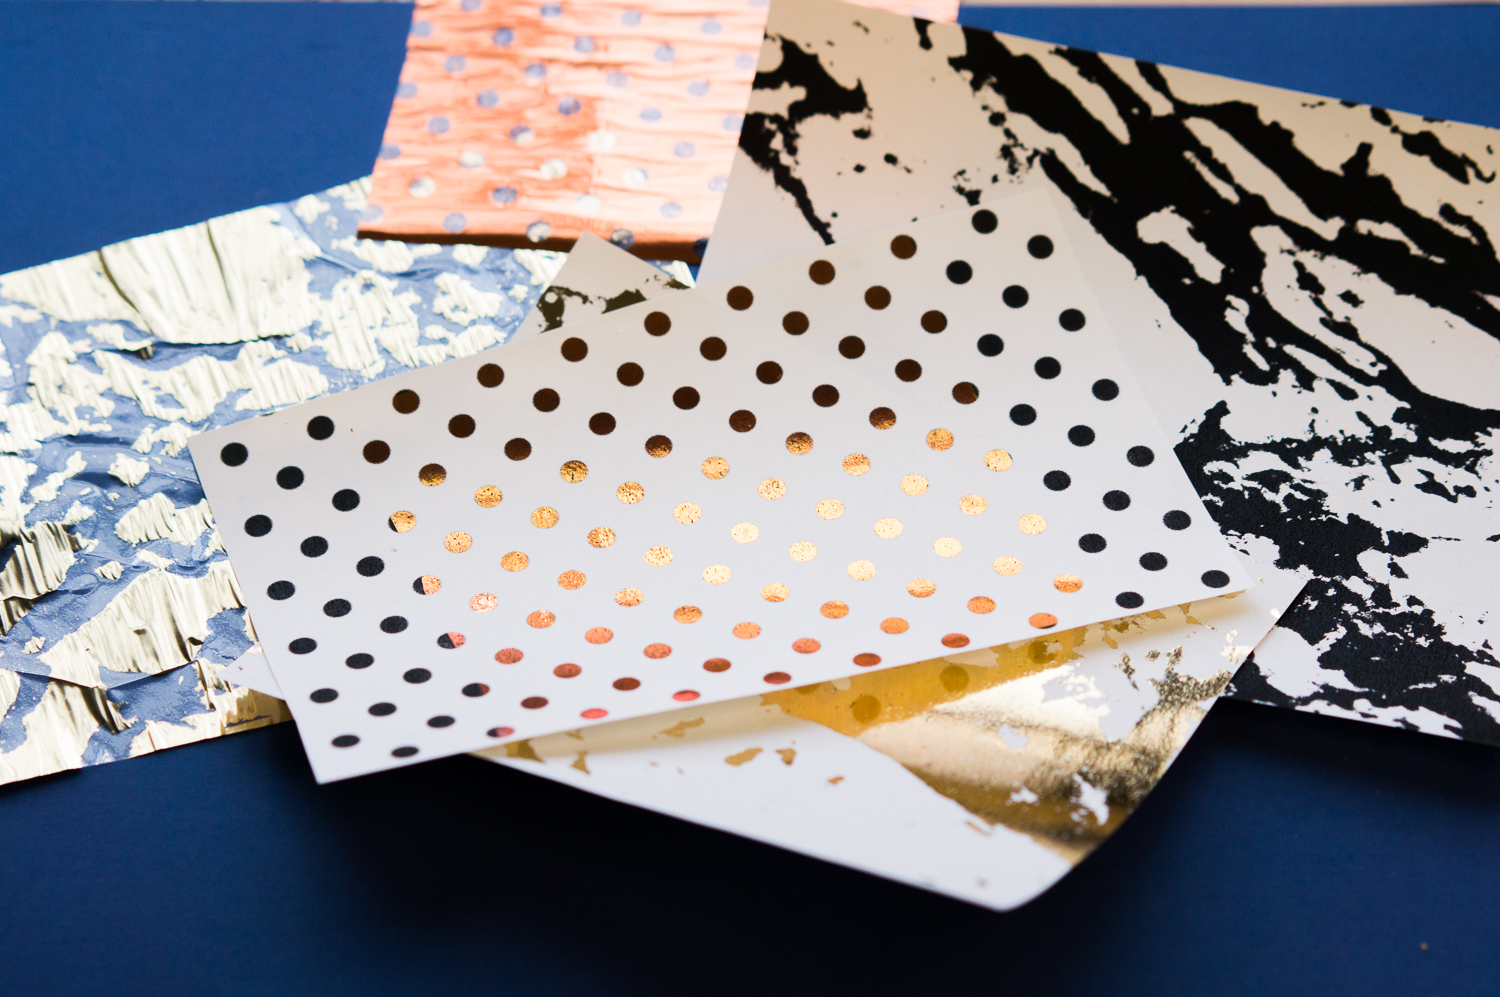
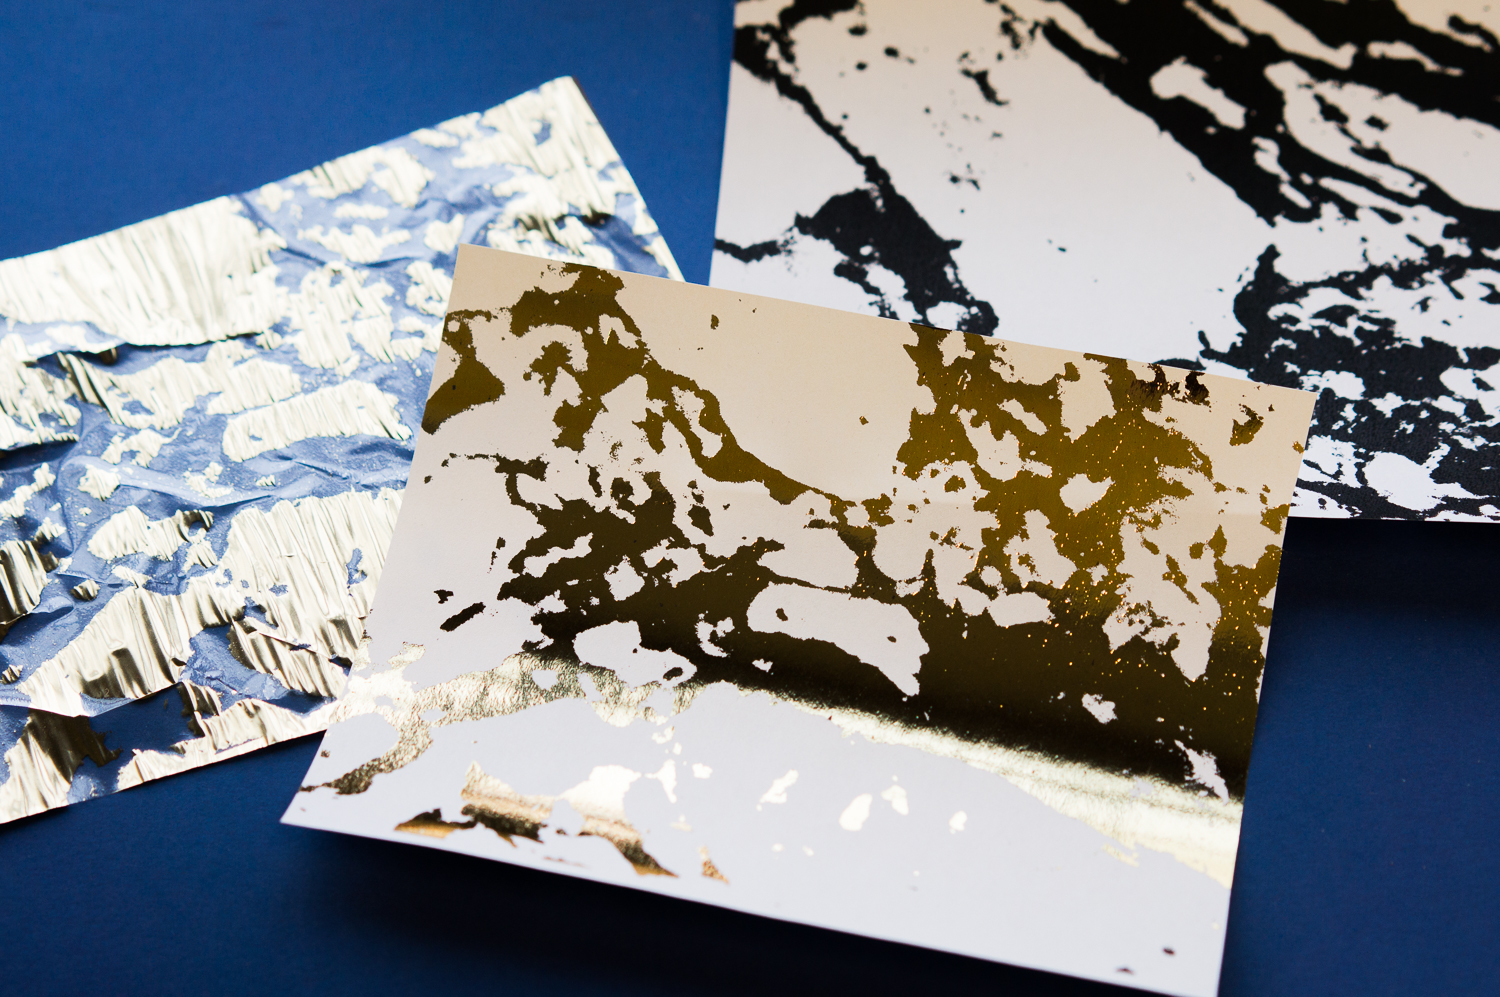
This shows the difference between standard hot-stamp foil (top) and toner-reactive foil (bottom two).
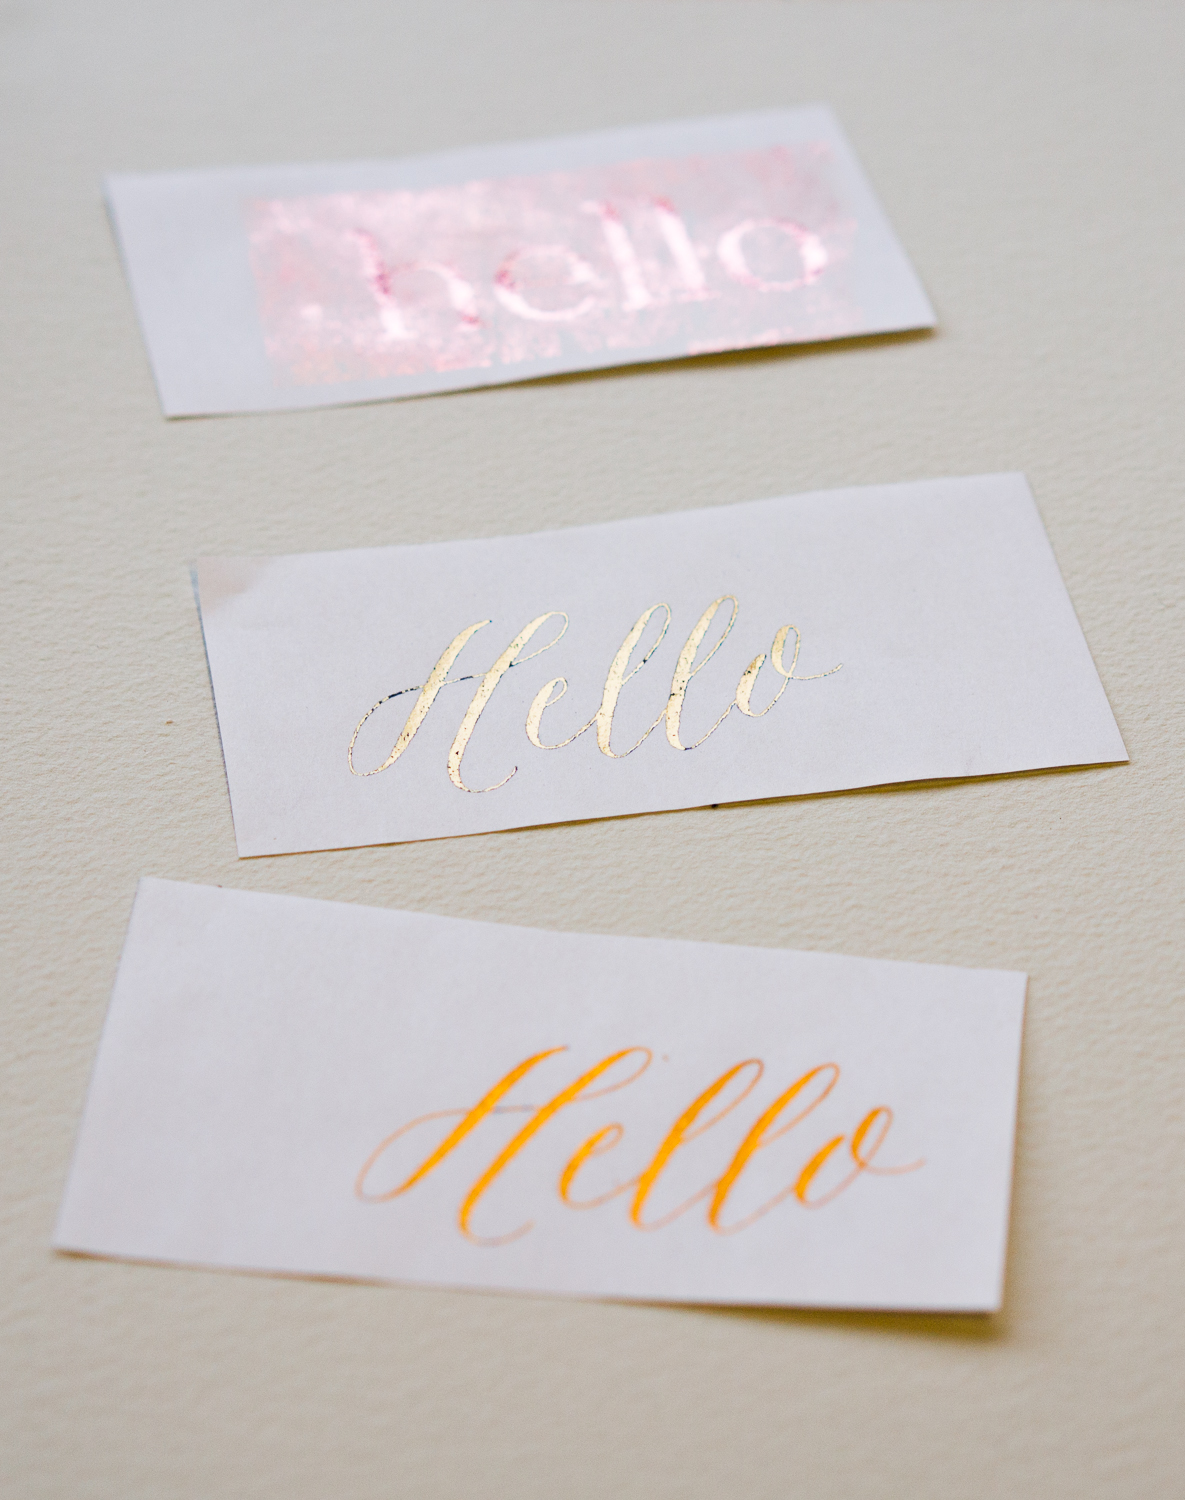
Turns out, this works on vellum, too…

Love your tutorial! By far the best one i’ve read… I’m having the same issues that you initially had with it coming out patchy.. What is your secret remedy?! I’m getting frustrated quickly
Thanks, Karla! The thing that makes the biggest difference is really the type of paper you use. My crappiest results were with papers with any sort of texture. My laminator is cheap, so it doesn’t have enough pressure to get the foil pressed into any low areas. My best results were on vellum, which was also the smoothest. Coated cardstock is another good bet. Other than that, making sure your printer is printing on high-quality or photo settings (more ink= more for the foil to stick through) and running the piece through the laminator a couple times has worked for me. You can also put another layer of foil down if you’re missing any big spots to fill in- that can help the patchiness.
The artwork can also make a difference! Dense areas have worked better for me than very fine details (i.e the polka dots and marble were more successful than the very fine calligraphy font).
Eventually, with enough trial and error, you’ll come up with the magic combination! I understand the frustration, though- it definitely wasn’t the walk through the park I initially imagined it to be. But these things never seem to be.