Duct and Cover, the Sequel
This is a sequel to Duct and Cover- to find out more about why I’m making a duct tape mannequin, read the first post here.
Ok, so hopefully you’ve mentally prepared yourself. You’ve tricked a friend/boyfriend/parent/sister/partner into helping you. You’re ready to do this. Here’s what you need to get started:
- A couple rolls of duct tape (I went through about 1 ½ rolls, but this will vary depending on how many layers you do, how much duct tape you waste by getting it caught on the stuff around you, etc). Buy 3, just to be safe. Also, you’re not an animal- don’t use the silver stuff. Pick a nice color.
- A pair of leggings and a tee shirt that you won’t mind sacrificing to the dressform gods. If possible, use a turtleneck or crew neck shirt, but a v-neck is workable if it’s all you’ve got. Also, now is not the time for a sports bra- wear a well-fitting bra with a little structure to it, unless you want to rock smooshed boobs as your daily look, in which case, go ahead, girl.
- Saran wrap
- Scissors
READY? Ok.
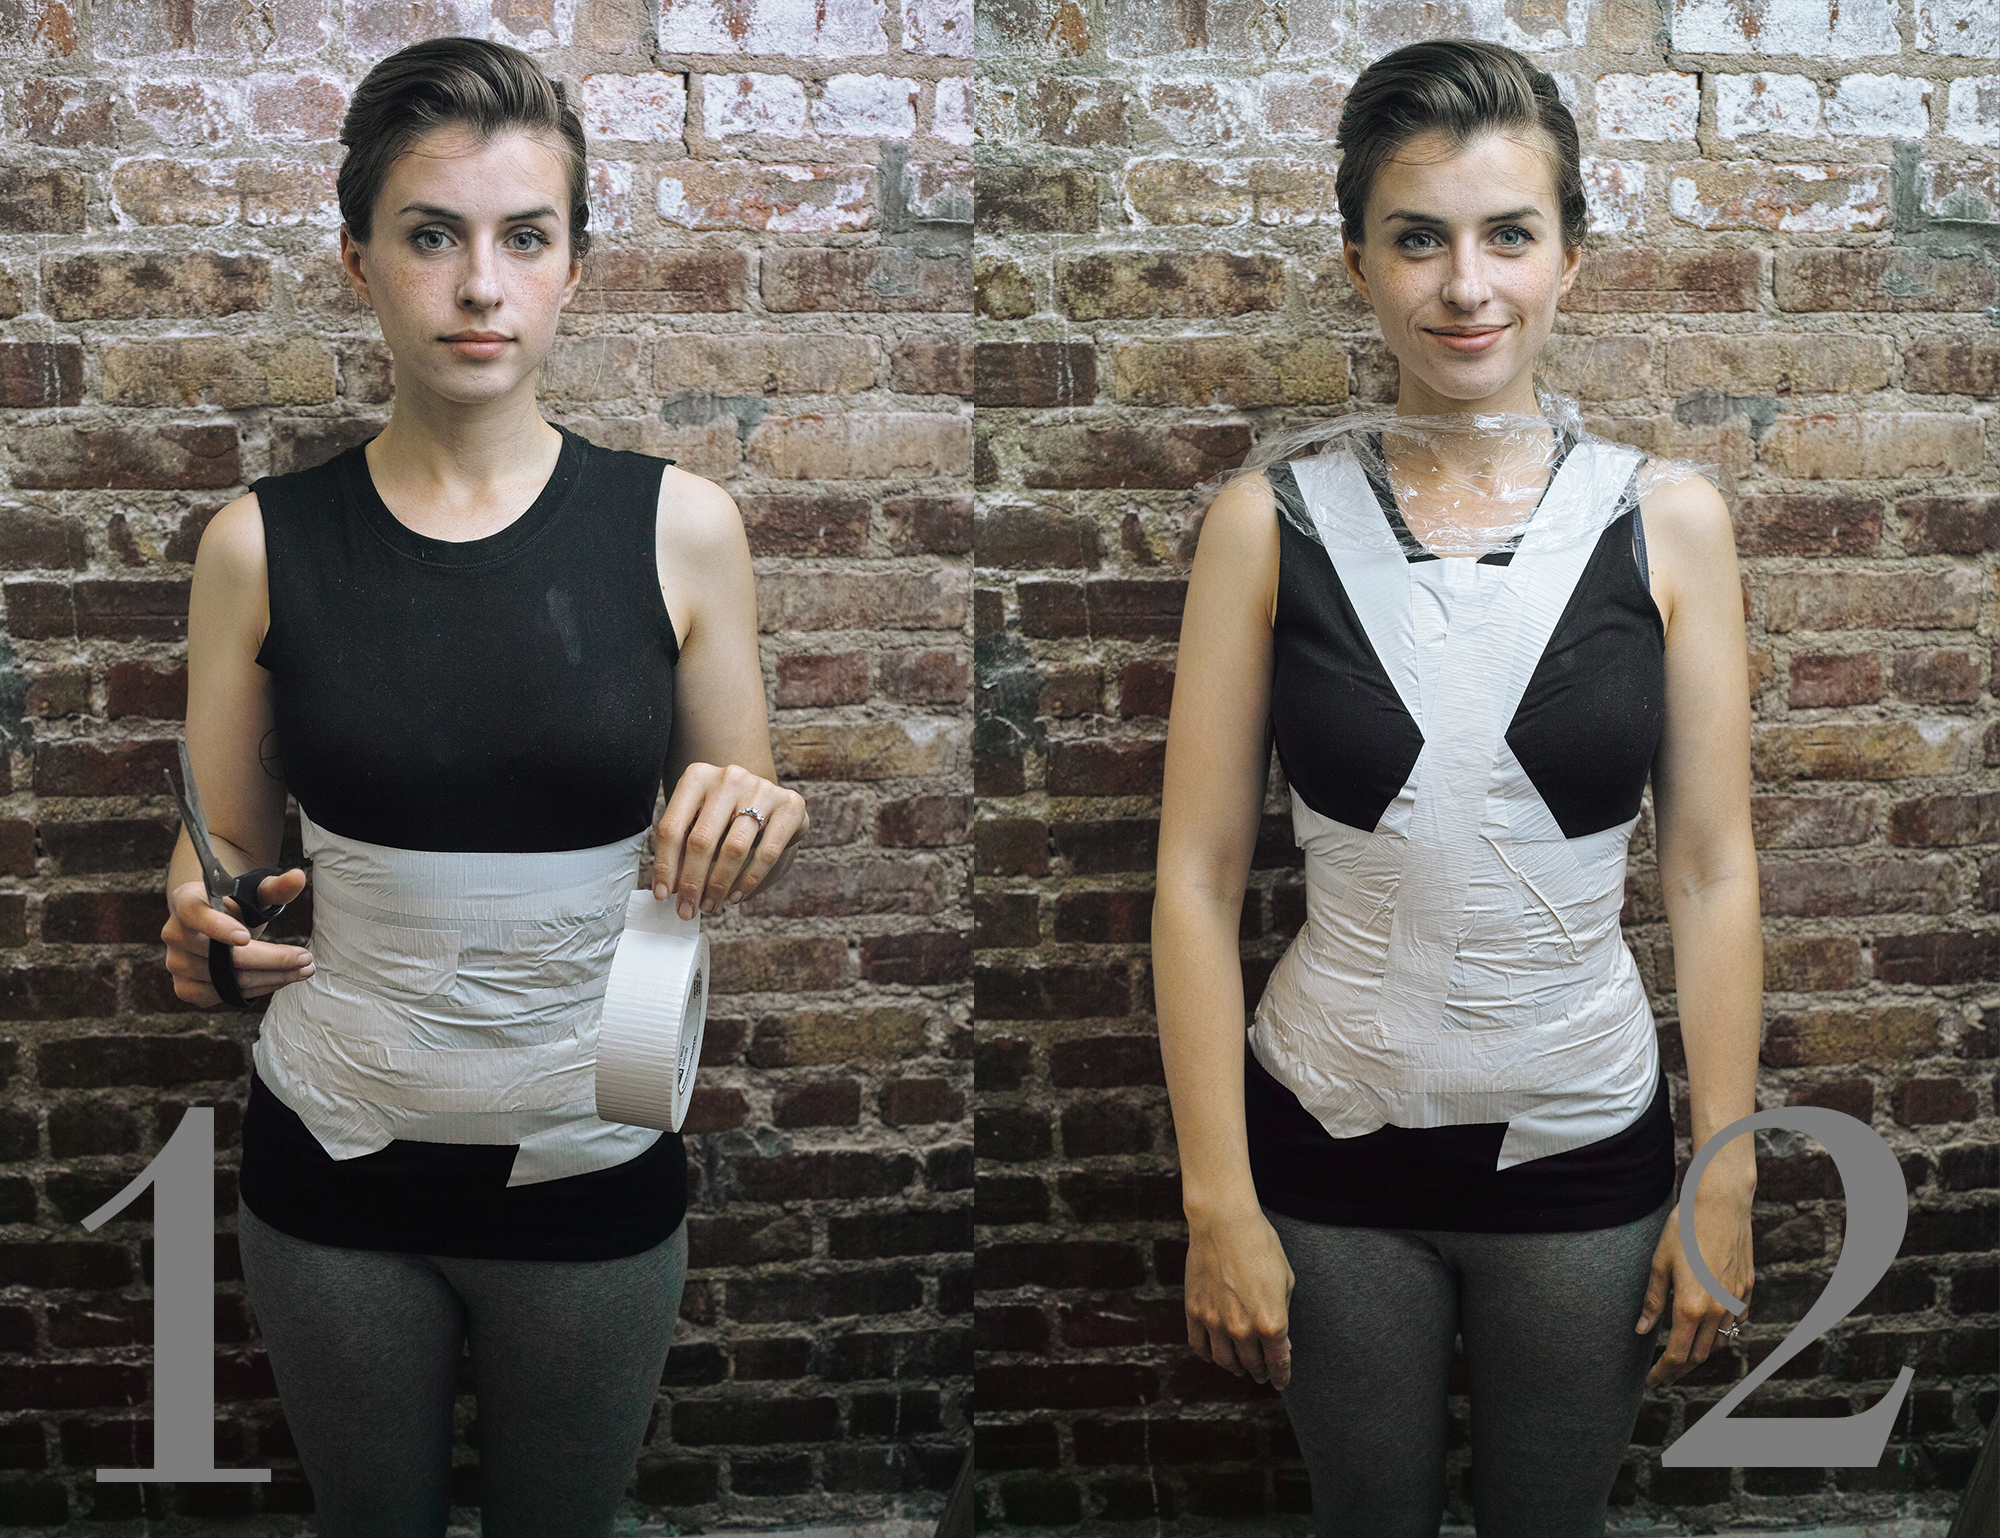
Step 1) Cut a hole in the box. Just kidding, and sorry for the 10-year-old reference, but I seriously cannot say “step 1” without following it up with “Dick in a Box.” Anyway. Start by wrapping your waist firmly.This will start to build your foundation, so it’s important that you start off right away with a nice snug wrap. Use pieces about 18” long and apply horizontally, front and back, overlapping the ends slightly. Do NOT try to just wrap in one long piece- this will not work. Keep all your pieces smooth, and continue to build above and below the waist until you have a duct tape waist cincher.
Step 2) Arguably the most important step- it’s time to work on the bust. As anyone who has tried to drape a bustier on a standard dressform can tell you, a correctly shaped dressform bust is essential for a professional fit. Most dressforms have a mono-boob situation or a cartoonish slope, neither of which are conducive to an attractive anything.
The first step is to create an X across your chest, starting at your shoulders, intersecting at the sternum, and crossing under the bust. Make this pretty snug- this is the key to creating that separation between the breasts- even if, like me, you’re not working with a whole lot to start with- and avoiding the monoboob. Next, add another snug piece of tape on the sides of the breasts, starting at the underarm and crossing to the waist on the opposite side. This is essentially creating a duct tape bra- you should be subtly pushing the bust forward and away from the side.

Step 3) Using short pieces of tape (no longer than 3 or four inches), start filling in the bust in a spiral formation, starting at the edges and working towards the apex. Use a light touch- you want to preserve the natural shape of the bust, not smoosh it into a pancake or squeeze it into some weird formation. Now is where that nicely structured bra I told you to wear is going to come into play- a lined cup will make this a whole process a lot easier.
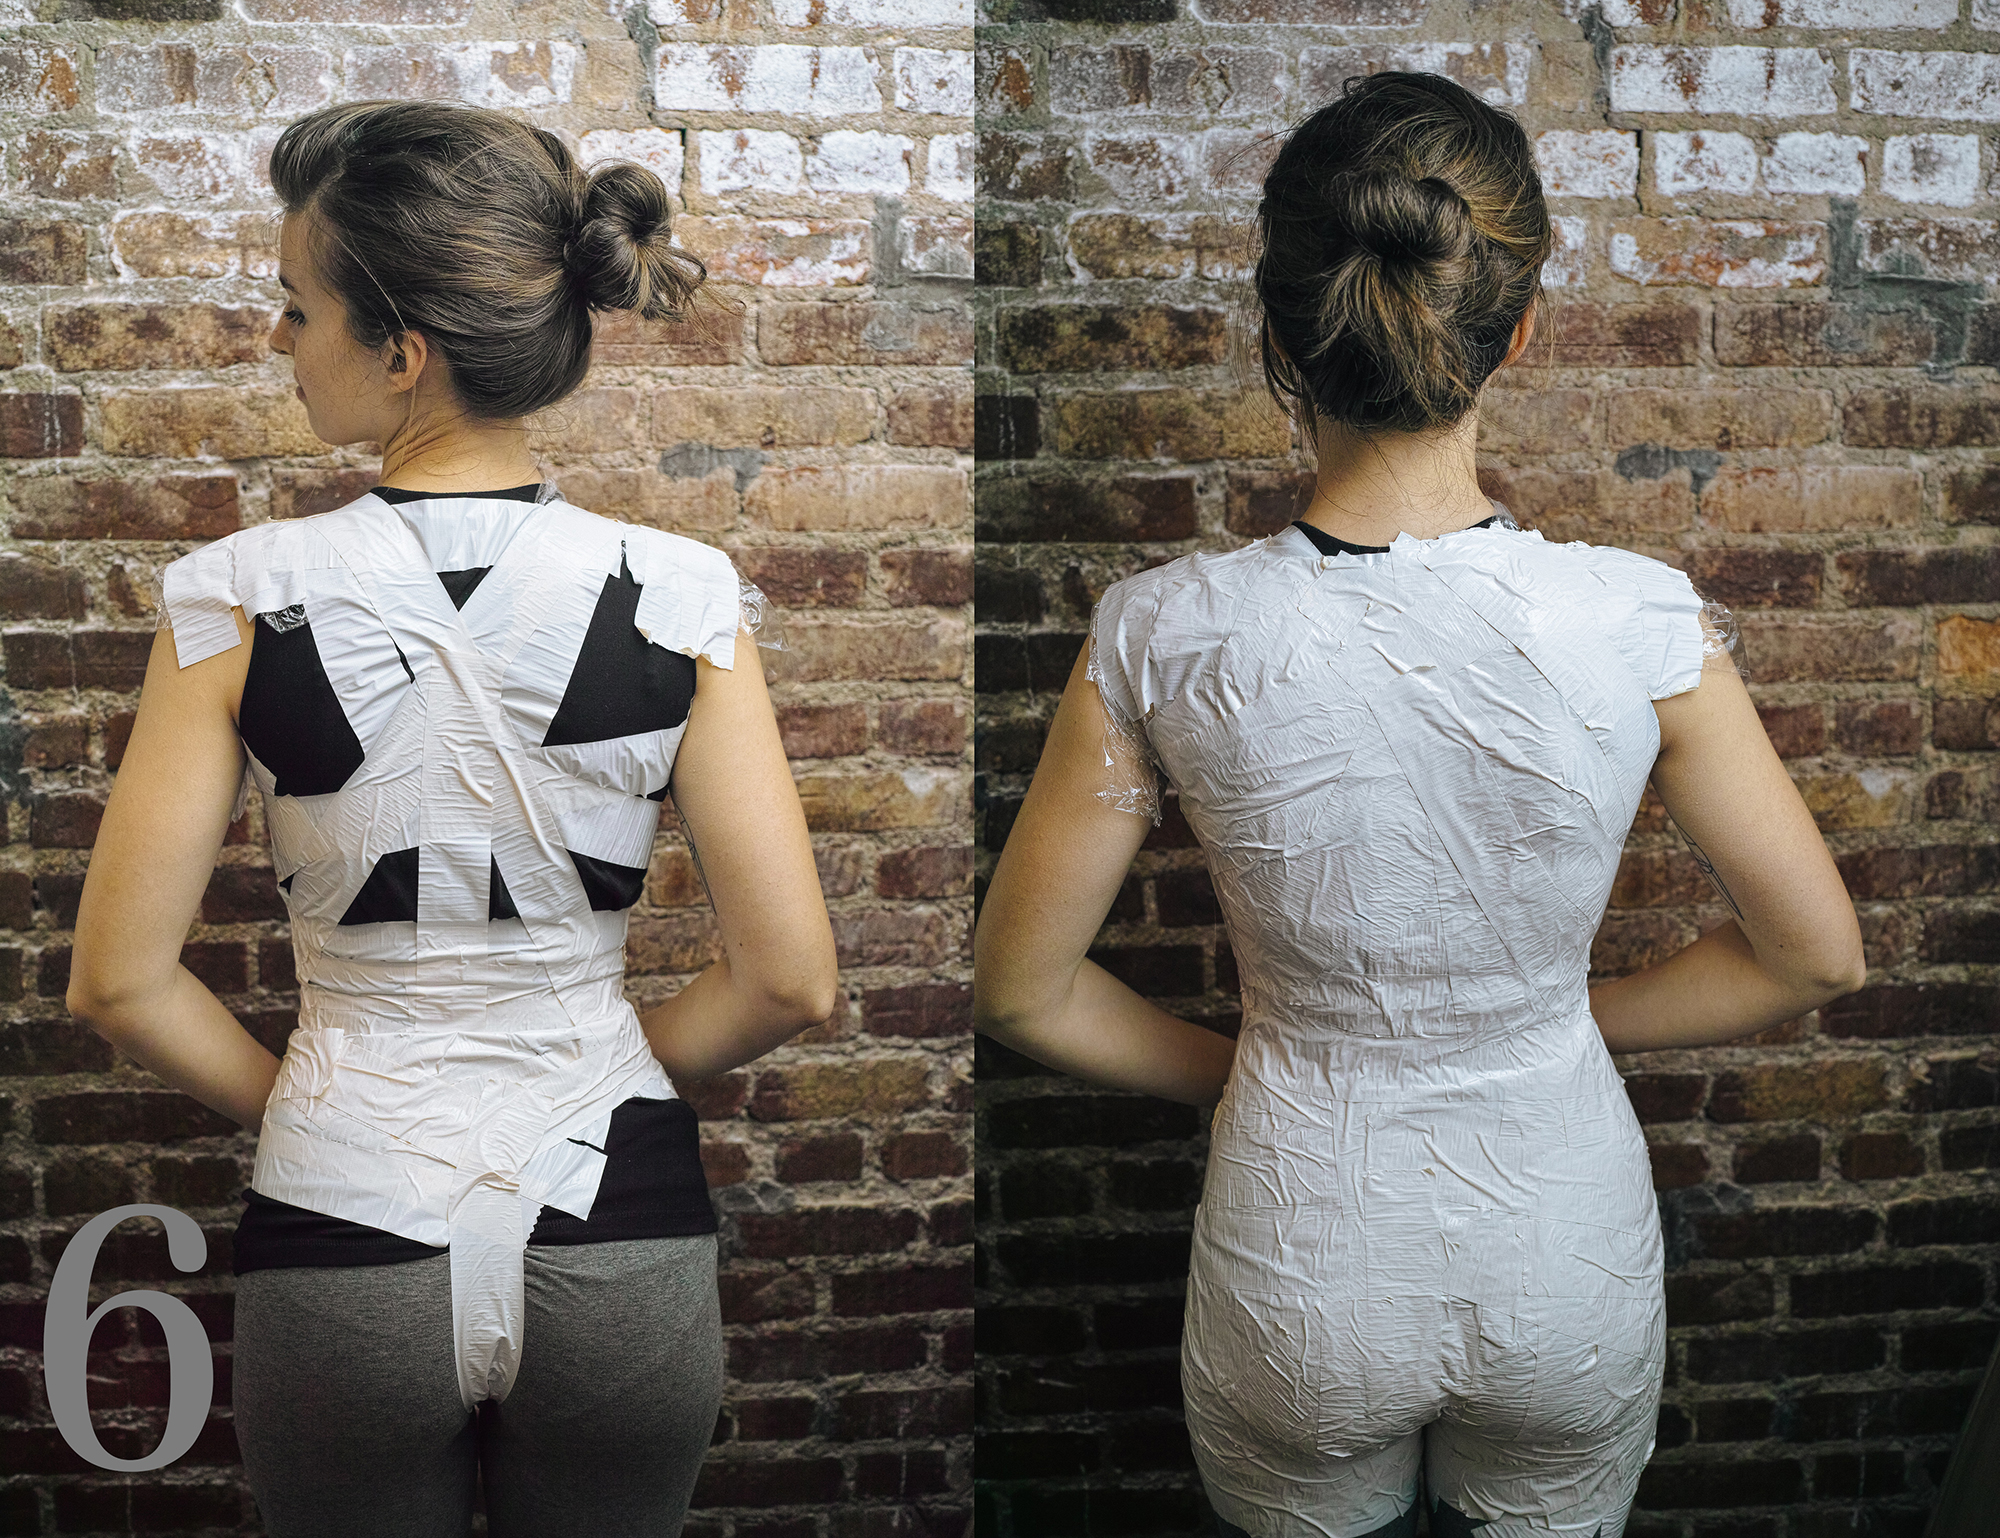
Step 4) After the cups are filled in, create another tight x-formation between the breasts to reinforce the separation. Now, begin filling in the remainder of the body. Use shorter pieces of tape on the curved sections of your body. It’s also not a bad idea to treat your butt in a similar manner to the bust- “scooping” underneath the butt will give some decent lift.
‘
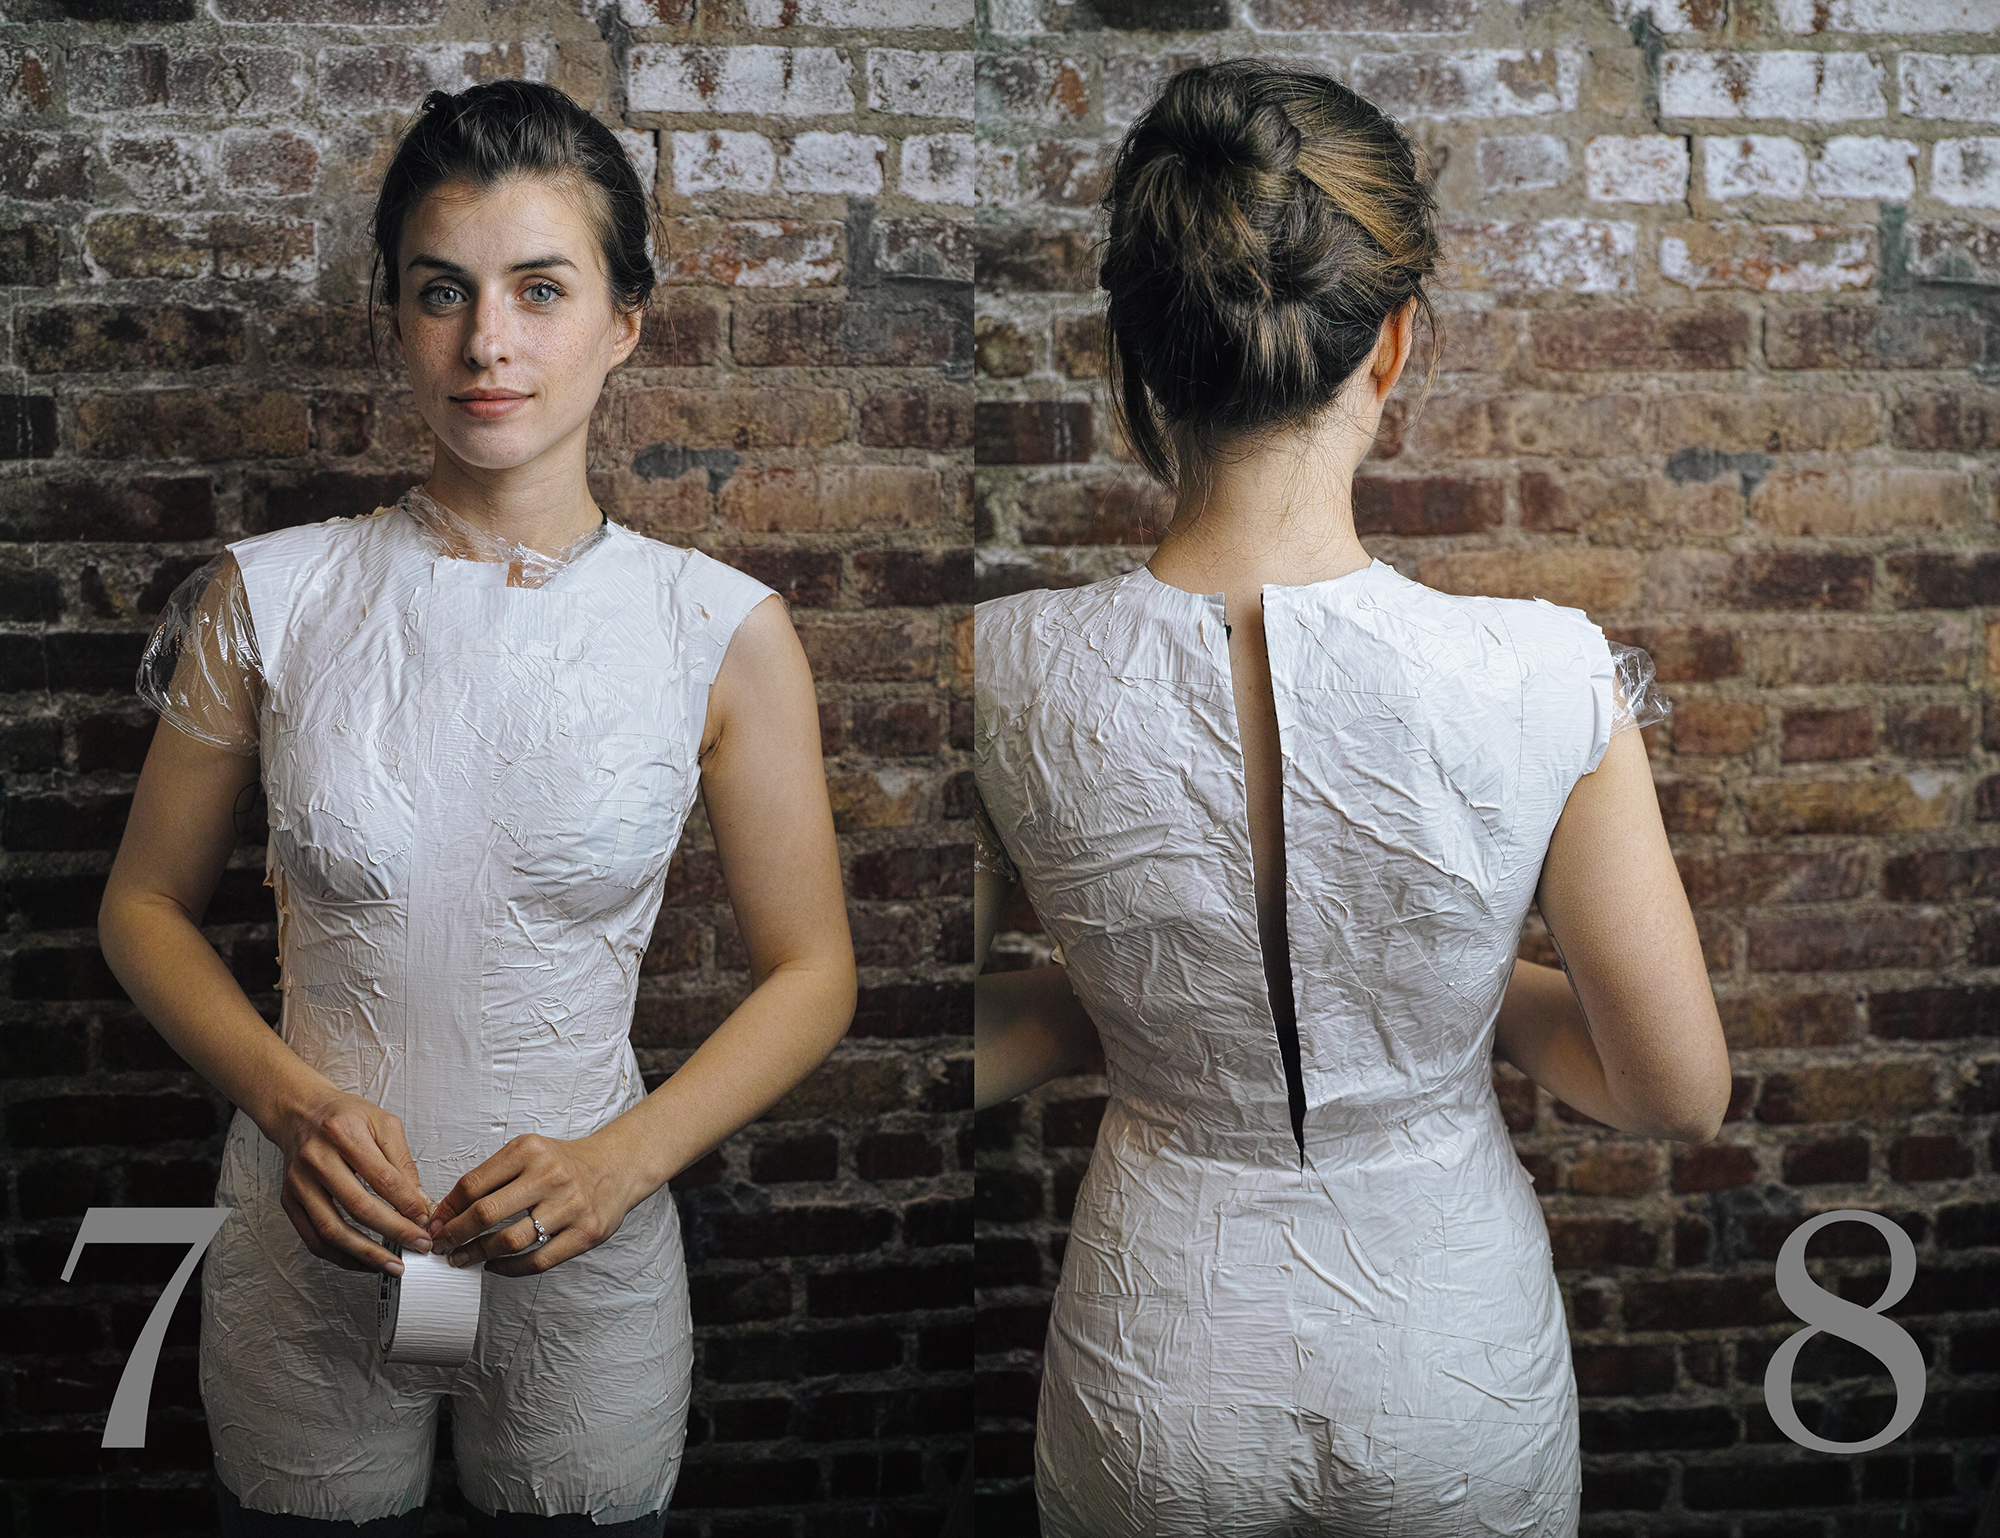
Step 5) Now if you plan ahead, you might get a shirt with a turtleneck and sleeves like i mentioned, and you can skip this step all together. However, that’s not how I personally roll, so I had a sleeveless crew neck. Any decent form will extend to the tip of the shoulder, for obvious reasons (you know, sleeves). Even if you’re planning to make a strapless dress and then throwing the form in the garbage, I still recommend building out a shoulder for proportion reasons. So, if you have a shirt that doesn’t cover the shoulders and neck, drape plastic wrap over your skin and tape to that. This isn’t a DIY waxing tutorial (but stay tuned).
Step 6) If you are choosing to do a leg form, make sure as you work your way down the hips that you are standing in a natural pose, feet about hip’s width apart. This is where things get even more personal, so get ready. From the waist, “draw” lines with the tape down to the crotch, like an ‘80’s aerobic workout leotard. As you can see, I also did a thong thing in the back, which is super attractive. You are then going to fill in with additional vertical pieces of tape. I filled in the legs about 3 or 4”, about midway down the thigh- but I am planning to use this form almost exclusively for dresses. If you have any plans to make pants, you will probably want to wrap until about at least the knee.
Step 7) After you’ve covered your entire torso with a single layer of tape (or thereabouts)- good news! You get to start over. You are going to want to cover your entire body with about 3 layers of tape. After the initial layer, though, it should be a lot easier. Feel around for any weak areas- you want to avoid any potential collapse of the form.
Step 8) Final step- actually getting out of this thing. Draw a line in marker down the center of your back, then very carefully cut THROUGH the duct tape AND t-shirt, from the neck to the widest point of the hips, until you can wriggle out of it.
Since I’m a moderately lazy individual, after we cut the shell off me, I put it on a hanger, hung it on my dressform, and haven’t touched it for a couple weeks. You’re SUPPOSED to stuff it, then, like, actually use it, but based on my schedule for the next couple weeks, I probably won’t do until sometime in August. But when I do, I’ll likely write something about it. So stay tuned for the riveting conclusion.
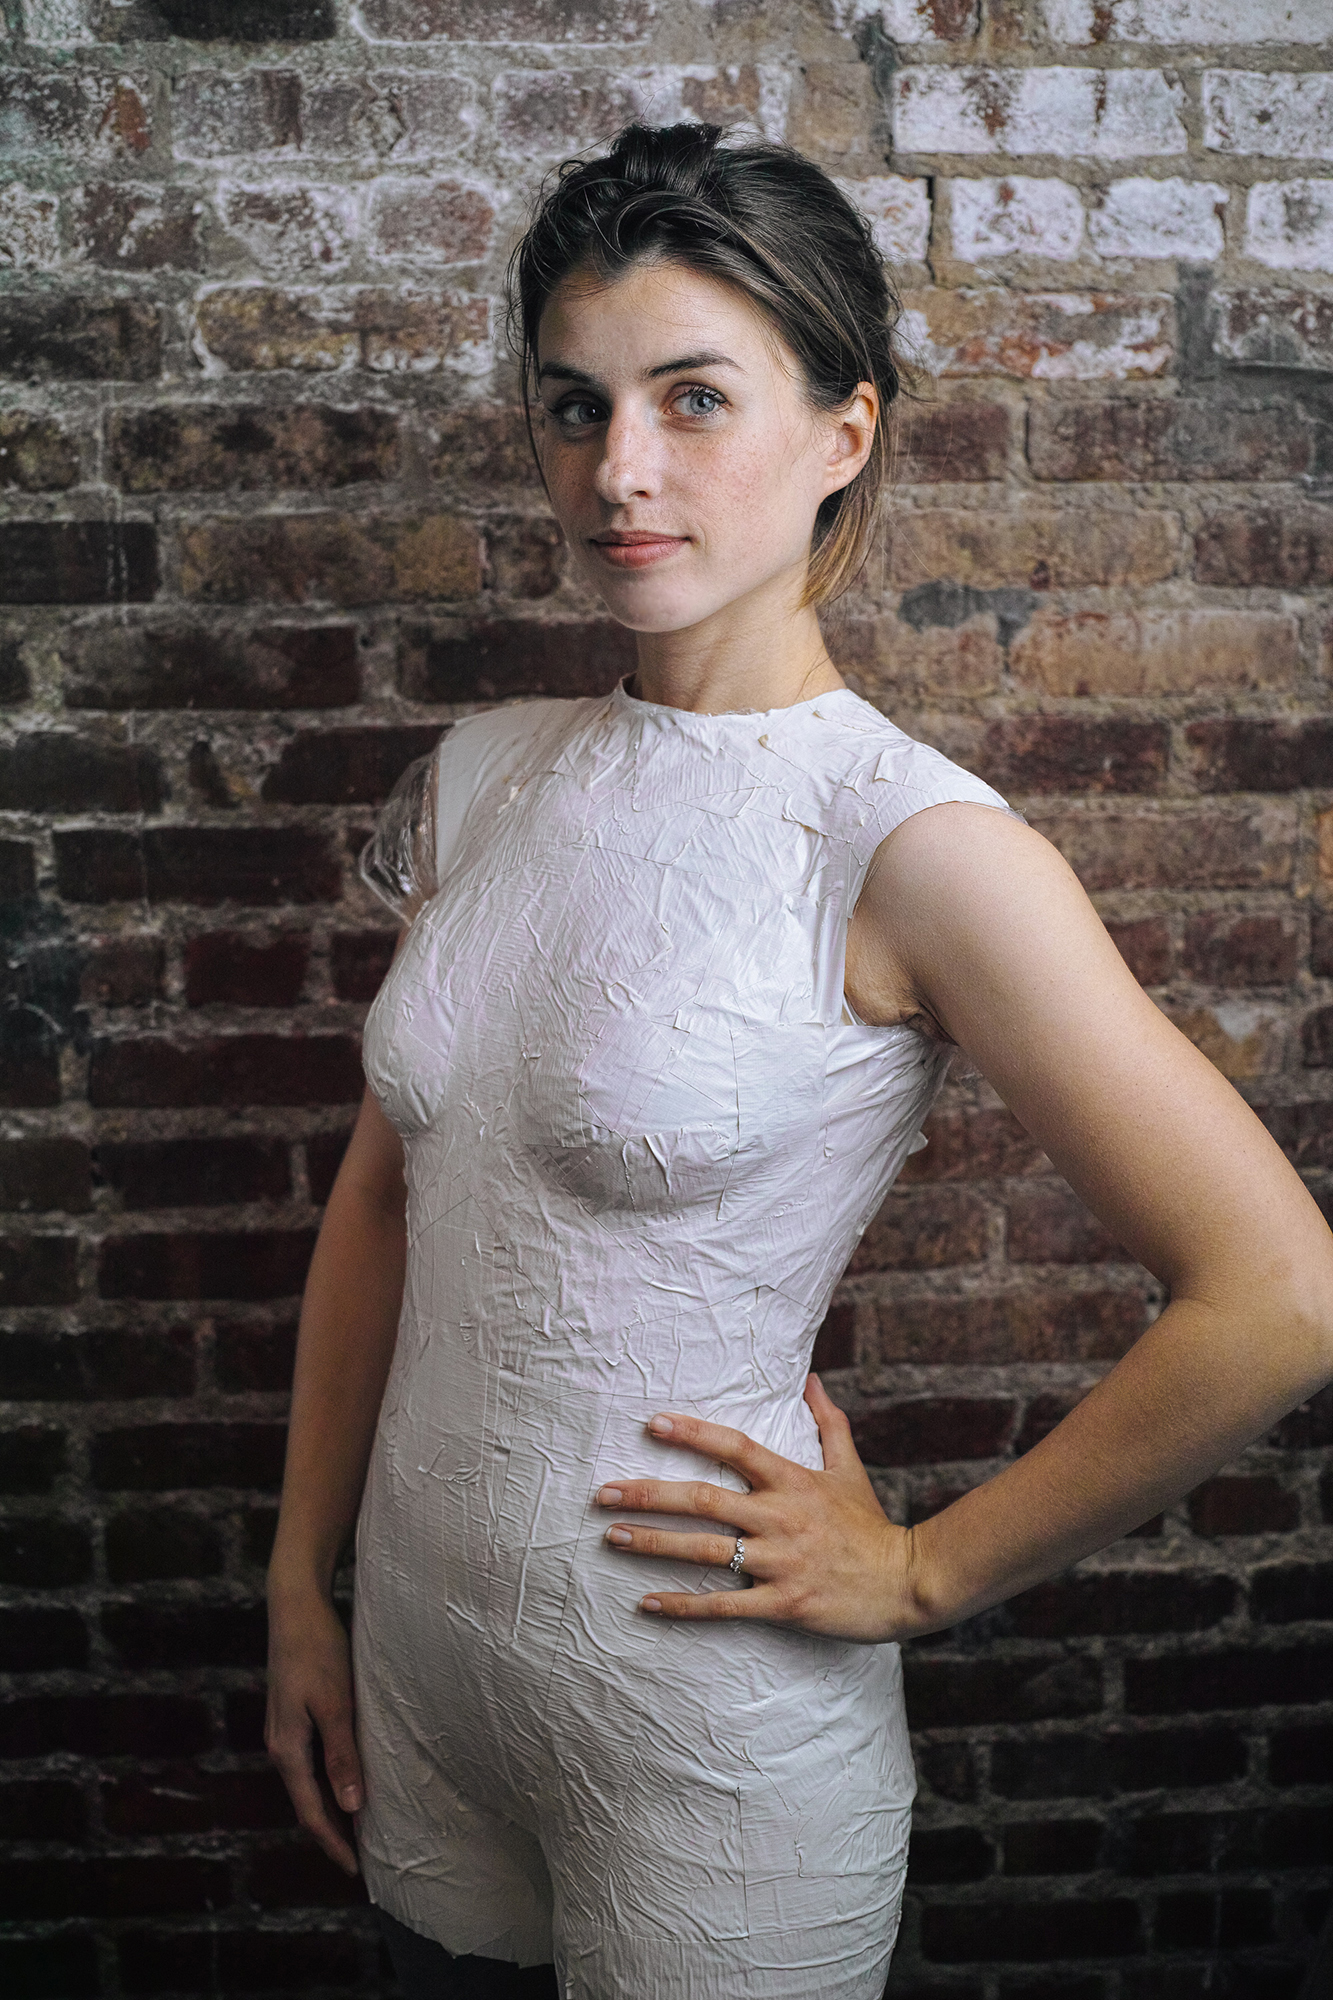
Looking real fly and smug. I might just wear this to the wedding.